As freelance writers, we don't always like to have our rates displayed publicly. That's because we almost never charge the same rates for every client. Our rates vary based on a lot of different things – so we like to keep it all open and personalize our rates to each client's specific project.
This isn't usually a problem. But a lot of clients, of course, want to be able to see rates while they're still window shopping, and they don't want to have to contact a freelance writer to do so.
The solution? Build a quote request calculator!!
A quote request calculator is perfect because it allows potential clients to see an estimate of charges for their project and it allows you to gather valuable information. Clients get their answers right away, but you don't have to be sitting online to give them those answers.
Win win!
(PSST, if you're short on time and would rather just install a prebuilt template, we can do that too!! You can purchase this entire template, complete with a ready-to-use growth tool opt-in, for just $45. Just install, add your own questions and answers, and you're ready to go!)!
Why use a ManyChat sequence to Build a Quote Request Calculator?
Why not just build a quote request calculator onto your website and email the results to a potential client?
ManyChat is amazing – easily one of my favorite tools. It's amazing for opening up conversations with people using a chatbot for Facebook. And, let's face it, people tend to read their messages more often than their email. It feels more immediate, friendlier, and more intimate.
Email is great, don't get me wrong. But it's not nearly as personable as Facebook messenger. Plus, something can always go wrong with email:
- It could get stuck in the recipient's spam box by accident.
- It could fail to deliver because of a misspelled email address or a full inbox (or about 73,000 other reasons).
- The client could forget to go check their email.
- It's just a bad customer journey to move them from the site that has your quote request calculator on it and tell them to go over to their email to get an answer.
By building the quote request calculator right into your ManyChat chatbot, you create a seamless customer experience with everything all in one place, and open a conversation with a new client.
Here's what you'll need:
- A breakdown of your rates and fees
- A Pro ManyChat account
Here are the steps we're going to be doing as you build a quote request calculator in ManyChat:
- Outline your rates (including what affects those rates)
- Set up your custom user fields inside ManyChat
- Set up your flow in ManyChat
- Set up your growth tool (so people can find and opt-in to your quote request calculator)
Step One: Outline your Rates
This one is going to be all you. Put together an outline or a chart of your rates and everything that might affect those rates.
Start with your base rate – the absolute minimum you will charge for your writing skill. For example, my base rate for everything is $0.05 per word. This is the minimum fee I will charge for any type of project.
From there, I will add a few cents to the base rate depending on specifics of the project. Think of it kind of like an a la carte menu of services:
- Content is an eBook: $0.15 per word
- Content is a blog post: $0.05 per word
- Social media niche: $0.05 per word (yes, I know this niche well, but because of the ever-changing nature of social media, it requires at least some research for every project).
- Blogging niche: $0.04 per word
- Working from home niche: $0.03 per word
- Small business niche: $0.03 per word
- Any other niche: $0.10 per word
- Adding in stock photo: $0.02 per word
- Adding in custom-created graphic: $0.05 per word
- Adding in custom photograph: $0.15 per word
- One round of editing: $0.02 per word
- Publishing to site: $0.02 per word
This is going to feel really weird to do at first, but trust me it will make building the quote request calculator much easier if you're able to separate all this out like this. Even if you wouldn't normally itemize your fees like this, doing so for this calculator will make the resulting quote feel much more personalized (even though the chatbot is doing most of the work).
So, based on this outline, for a client wanting an ebook in the social media niche with one stock photo image, one round of editing, I would charge right around $0.29 per word.
Of course, this isn't set in stone, and there are plenty of other things that might affect how much you actually want to charge for a project. But this outline is just to set up the base of your fees so you can give potential clients an idea of what they can expect.
It's not a contract.
Step Two: Set up Your Custom User Fields In ManyChat
ManyChat is going to use the custom user fields to store all the information that the clients are going to input for the quote.
So, log into your ManyChat account and go to your settings:

Once there, select the custom user fields:

And the first field we want to create is going to be the actual per word rate – what ManyChat is going to tell us what we should charge. Be sure to set that up as a number:

Now, if you're like me, then you don't want ManyChat to just serve up a solid quote, but would rather it show a range. So, we're going to create two more number field, one for the low quote:

And one last custom field for the higher quote:

Finally, you're going to want one custom user field, set up as text, for each question you're going to ask the client (based on the outline you made earlier):
Once all you custom fields are set up, it's time to start working on setting up the sequence itself.
Step Three: Set up Your Flow in ManyChat
Okay! Now for the fun part.
I build pretty much every sequence as a new Flow so I can keep everything organized and easy to find later (should I ever need to make any changes to it). So, head over to the Flows and create your folder. Then create a new Flow inside that folder. (For simplicity's sake, give the folder the same name as your new Flow):

Once you get into the Flow Builder, you'll be met with the default starting step, a message. Eventually, we are going to change this starting step to have ManyChat run a couple of checks for us, but for now, let's just go ahead and start with this starting step:

Since I am going to use my Growth Tool for any explanations, I am going to jump right into this Flow by asking the first of my questions.
Choose the User Input option (required so we can save their answers and refer back to them later):

Then go ahead and type in your question. Remember, this is an automated service, but it's also a chatbot – so the messages should be short, easy to read, and they should feel more on the casual side than formal:

For most of these questions, you're going to set up the User Input as a Multiple Choice option. This will allow you to create small buttons for each answer, which helps the clients keep on track (and reduces the number of mistakes made because of mispellings or something like that):

When you delete the retry message and the skip button text, that will remove the option for either of these to be displayed to the client. Personally, I like removing these options because I want the client to hit one of the buttons (which is also why I have not checked the “Also allow free text input” option).
Make sure to save their response to the correct user field from the list that you created earlier:

Add in one button for each option for this question that might affect the rate:

Then, at the bottom of the edit window, check the box next to “Continue to another step.”
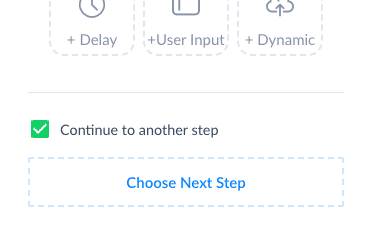
For the next step, you're going to have ManyChat run a Condition.
More specifically, ManyChat is going to check that custom user field you just saved the response to and see if it matches the first option (make sure you enter in the option exactly as you have them entered on the buttons above):

Conditions allow for a really simple true or false check. Once you've defined the condition, you'll set up what ManyChat should do next based on whether or not the condition returned true or false.
In this case, if the condition is true (yes), set ManyChat to perform an action next. If the condition is false (no), set ManyChat to run a new condition:

For this action, you are going to tell ManyChat to make a change to the Per Word rate based on the amount you've assigned that particular answer:

And the new condition is going to check to see if that custom user field for the first question matches the second option:

Then, same thing as before. if the condition returns false, set up a new condition checking to see if it matches the next option.
If the condition returns true, run an action adding to the Per Word Rate in accordance to your scale:

Once you've run conditions for each of the options, you should see something like this in your Flow Builder:

Then, set up the second question. You'll connect the action steps from question one over to the message for second two:

There may also be times when you need to follow a branch into a separate line of questioning. For example, one of the types of content that I write is fiction novels. But obviously, if someone is looking up quotes for a fiction novel, they are going to want to see choices pertaining to that novel rather than anything that would be specific to blog posts or social media.
In these instances, I follow one branch of questioning through to the end before going back to the main line of questioning, that way I am less likely to miss something and I can always choose when the two lines of questions will merge back together again:

You may also want to allow your audience the chance to type in their own answer to one of your questions. Such as in this case, when they are choosing a topic category.
I charge one rate for parenting and productivity niches and another rate for social media content. And I would charge another rate for any niche outside of those areas. But rather than try to think up a list of possible answers to try to include them all, it's easier (and more engaging) to allow the client to type in their topic when it doesn't match one of the options given.
So, to allow for this, I offer it as a button when the condition runs, if that button was selected it's an automatic increase of $0.05 per word onto the rate. Then I asked them to type in their answer and I tell ManyChat to save that new answer into the same field (this will overwrite the “something else” answer that the button programmed into that space).
However, there is also always a chance that the client may change his or her ming — maybe they just tapped on that button to see what would come next. Or what new possibilities might be listed. But when they find that they have to type, they might not actually want to. So, just in case, if you do allow them the option of type in their own answer, make sure you also add in a way that allows them to go back to the original choices if they want to:

And, of course, since the Per Word Rate was increased when they hit the “something else” button, if they change their minds and decide to go back to hit a different option, you're going to want to change that rate by subtracting the same amount:

In some cases, you might want to list more than one option even if they would affect your rates in the same way. For example, with blog posts, I charge the same rates for posts that are 400 words as I would for posts that are 750 words. I don't make a change in my rate until up into the 1800-word count range.
But, I want to list the word counts as separate options in the sequence so the client feels as though he or she is able to ask for exactly what he or she wants. I know that when I am filling out forms, I get irritated if I feel forced into a decision because of limited options, and I want to make sure my clients like the experience they receive when doing this.
So, in cases like this when two answers would have the same result, you can add them to the same condition and ask ManyChat to check for any of the conditions (rather than all):

And there are times when you may just want to run two different actions off the same condition, rather than checking for another condition.
For example, I charge one rate for blog posts that are 1200 words and up and another rate for blog posts that are 800 words and under. So, once I have the condition set up checking for the two smaller lengths, I don't need to run a check for the two longer lengths. If the answer is 400 words or 750 words, add $0.01 to the Per Word Rate. Otherwise, add nothing to the Per Word Rate:

You're going to keep adding in questions, condition, and checks until you've gone through your entire list of options.
Once you're all done setting up all your questions, it's time to tell ManyChat how to put together all those answers:

I like to offer a range at first. I find that a lot of times clients really want to see flexibility in their quotes. Plus, no matter how many questions I add into this quote request calculator, there is always going to be something that I missed. By presenting a range, it helps the client understand that this is just an estimate and that any final quote I offer them will truly be tailored to them and their project.
And clients love to feel special.
So, first, we're going to calculate the Per Word Rate – Low field, which is going to serve as our lower quote:

But instead of adding or subtracting, we are going to plug in our own custom formula:

The exact formula you use is going to be up to you. Here, I have ManyChat multiplying the Per Word Rate (as per the responses the clients selected) by 0.8 or 80 percent. So, if the Per Word Rate comes up to $0.30 per word, then the lower end of the bid will be quoted as $0.24:

For the Per Word Rate – High, we're going to set up basically the same thing, except that instead of multiplying it by .8 we are going to multiply it by 1.10 (which adds a 10% increase to the rate):

Once those calculations are set, it's time to let the client know:

I'm going to end this particular Flow here for this example, but from here there are all sorts of things that you can do with this:
- Invite them to book a call with you, which can open up a new booking flow.
- Offer to send them this quote to their email address (will require asking them for their email address).
- Create a time-sensitive coupon or offer guaranteeing to lock in this rate for a certain number of hours, days, or weeks.
- Give them a link to a page outlining more details about what is included with your work.
And, of course, when they make their choice, you will want to set it up so that ManyChat notifies you of their choice (so you can respond live accordingly):

Finally, once everything is all set up and done, it's time to set up the first step of this Flow (remember, I said we were going to be changing it).
There is going to be a chance that some clients will go through this Flow more than once. And if they do, you want to make sure that every time they go through it, they start fresh.
Head back up to that very first message and somewhere near by create a new action telling ManyChat to set your Per Word Rate back to your base-minimum rate:

Then, connect this action to your first message and change the starting step by dragging that green flag over:

Now every time your client goes back through to get a new quote, they will always start with a clean plate.
Step Four: Set up Your Growth Tool
The exact growth tool you choose to set up is going to depend on how you want to invite your clients to opt-in and request a quote.
I find that having a Ref-URL set up is the easiest way because I can share it as a link to just about anywhere: into my emails, my pitches, even on social media. I can even send the link out to my current ManyChat subscribers, inviting them to come and check out the tool.
The real goal is to make sure that it is easy to find and easy to use — as a chatbot should be.
So, to create the Ref-URL growth tool, first navigate to the Growth Tools area of your dashboard and select the blue + New Growth Tool button:

On the next panel that opens up, select the Ref-URL option:

On the next screen, , you're going to want to click on the Edit button so you can customize your message.

Your growth tool is going to contain the first message that your potential client will see after opting in, so this is the perfect place to explain how the quote request calculator will work as well as any terms and conditions or other little disclaimers that you might want to make sure they know about.
I also like to make sure I always give people a way to get a hold of me – the human – at any time. After all, it wouldn't be a very good chatbot if it didn't help them chat with me, right?

And that's it!
Once everything is set up and working the way you want it to, send the link to a couple of friends or trusted colleagues to test it out and see what you think. Are the rates being quoted close to the rates you would actually quote?
If they're not, go in and make some tweaks to your formulas until they're closer. Although this calculator doesn't need to be exact, it should be close enough so that any clients who go through the entire process don't feel like they were baited in for a switch.
(PSST, if you're short on time and would rather just install a prebuilt template, we can do that too!! You can purchase this entire template, complete with a ready-to-use growth tool opt-in, for just $45. Just install, add your own questions and answers, and you're ready to go!)!


