When I first started working for myself at home, I had absolutely no interest in Instagram at all. In fact, I had no interest in running any part of my business on social media. Boy, how things have changed? Huh? Now, I practically live online. And not just because I have to because “it's my job.” But I love it. There's not one thing I would change about this life. I've even learned to love Instagram. And I love it, even more, when my profile feed looks nice and organized. And that is why I have been working with a seamless background effect on Instagram.
Now then, let me start off by telling you right away, having a background effect or a grid on Instagram is not a requirement. There are plenty of people out there who find success on Instagram and don't have either of these things. And there are some people out there who don't like the look of grids and themes when they go to check out a profile. They find that putting that much thought or planning into your social media posts makes you sound disingenuine. I disagree: I believe you can be strategic and plan out your posts and still be authentic and true to yourself.
And I will also tell you that I don't do these backgrounds or the grids for my followers. Truth be told, I do them for me because I've found that they keep me motivated to keep posting. And I like including quotes in my posts because I am not a good photographer. It takes me forever to figure out how to take a good photo, and usually by then my light is gone and my subject (usually one of my kids) has gotten bored and wandered off to see if there are anymore Doritos on the floor*. So, while the information that I post is for my followers, the overall look and feel of my Instagram feed is for me.
So, let's get this show on the road, shall we?
First, there are a few things that you're going to need:
- A calculator (yes, there's some math involved)
- PhotoShop (this software will make getting the edges you want super easy. Yes, it can be done in other photo editing software, but it will take a lot longer)
- An account with Canva (to help keep your background organized once you've designed it)
This is going to work in three major steps (which we will then break down into smaller steps):
- Create the large background (must be large enough to cover nine Instagram photos)
- Slice the background image into smaller, square images
- Organize your square images into the order they must be posted on Instagram
Easy right? You ready?
Create the Large Background
Before you can create a seamless background effect on Instagram, you need to know basically what you want your pattern to look like. I've done several, starting with the same polka dot pattern that you could see on my old site, follow by coffee rings, and now this new one is going to be based on the handprint that you see in my logo (funny story about how I came up with that idea — remind me to tell you about it sometime). Do a little bit of planning and decide what elements you need to get you started.
Once you know what you want your pattern to look like, time to head on over to PhotoShop. (Quick note here, you can actually design the background anywhere you like. I'm using PhotoShop because of how easy it is to slice up the image once it's done.)
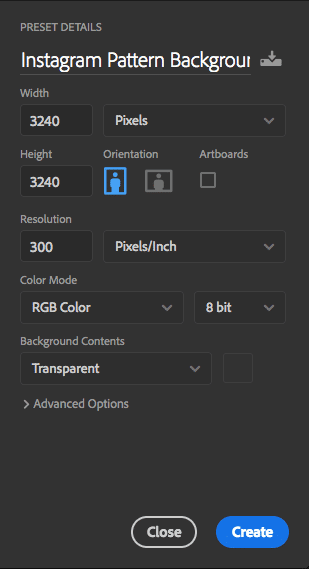
You're going to want to start with a new document, size 3240px x 3240px.
Why 3240×3240?
Because the ideal size for an Instagram image is 1080px square. And currently, the Instagram feeds hold 3 images per row (I've heard the rumors that they will be moving to 4 images per row; if and when they do, the math here will change. But for now, we will just stick with the 3240px square).
Now, go ahead and throw your design together. I find that these backgrounds look best when they look random. To start your first one, I recommend using simple patterns, like triangles or circles of different sizes, rather than the more complex images.
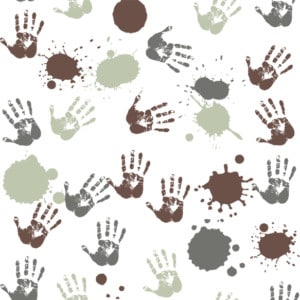
So, I'm going to copy my handprints, using colors that match my branding, and scatter them across the image.
And just for a little bit of fun, I'm also going to go ahead and throw in a few paint splatters in the same colors.
Now, since 3240 pixels high is enough for three rows, we want to make sure that when we start that 4th row, that the pattern still matches up without having to have a big white bar interrupting the pattern. After all, part of what makes this technique look so cool is the fact that the background goes from one tile to the next to the next smoothly. So, to make sure the bottom edge of the graphic lines up with the top edge, we are going to do what's called “Offsetting” this image. This means we are going to split it across the middle, moving the top to the bottom and the bottom to the top.
If you've been working in layers, go ahead and merge all the layers down. When you're ready, go to Filter >> Other >> Offset:
Set the Horizontal offset to 0 pixels, and the vertical to 1620 (half of 3240).
See how the splashes and handprints on the bottom of the graphic now line up exactly with the splashes and handprints on the top edge? That's what we want here.
Now, you may find it a little messy in the middle. Go in before you do anything else and clean it up where you can using an eraser and copying some new layers on top. You can do anything you want to the graphic now, just do not touch the top of the bottom edges.
When you're happy with how it looks, you're done. Go ahead and save that image and get ready for the next step: slicing it up.
Slice the Background into Nine Equal Parts
If you're not a math person, you'll be glad to know that you don't need math for this part. The ideal size for an Instagram post is 1080…and we started this image at 3240 (1080 times 3). So we're going to slice this graphic back down into 9 equal parts: 3 vertical and 3 across.
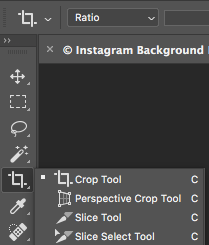
First, select the Slice Select tool:
Then click somewhere on the graphic. It doesn't really matter where. Once you click, you'll see the gray “Divide” button at the top working.
Go ahead and click on Divide.
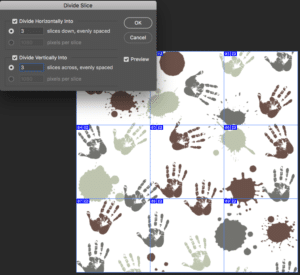
Next, tell PhotoShop how to divide the image: 3 and 3.
That's it! It's all sliced up. You can see PhotoShop has divided the graphic up into 9 smaller graphics and numbered them all.
To save, go to File >> Export >> Save for Web (Legacy).
Make sure you shift+click on all nine images to select them (a slight yellow border will highlight each one as you select it). Set your preferences for how you would like the images to be saved (since the next step involved uploading these images over to Canva, I chose to save them as jpegs with high quality).
When you're done, click on Save, choose your folder, then select “HTML and Images”.
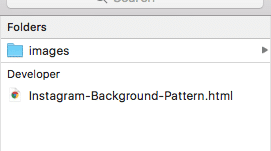
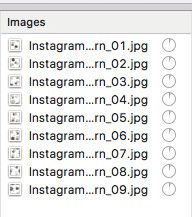
PhotoShop will automatically save an HTML file along with a folder called “Images.”
Each image will be named the title of the graphic you were making, plus the corresponding number from the slices it made.
And you're done!! All that's left to do is start using and posting this seamless background effect on Instagram.
Organize your Graphics
Now, looking at how PhotoShop sliced up that image, we obviously want to use number 9 first, then work our way up to number 1 before starting all over again at number 9. This will ensure that our background looks exactly like the image.
I like using Canva for this because I can set up nearly a month of backgrounds all at once. To do this, log into your Canva account and when prompted to choose a design, select “Instagram Post.”
First thing's first, rename the design right away. This way if you have to pause for any reason, you know exactly where to go when you get back.
If you have a paid Canva for Work account, you can create a new folder especially for this project, and rename it to anything you like.
If you have the free account, you can still upload all your background images, you just won't be able to sort them into their own folder.
Now, go ahead and upload all nine images straight into Canva. You can upload them any way you like, all at once or one at a time. I like to upload them so they emulate the exact pattern I'm recreating in Instagram.
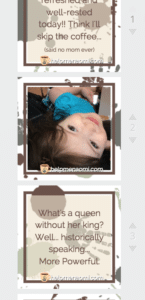
Next, you're going to want to set up your basic Instagram layout. I like to have one frame in the background that will house my backgrounds, and then frames that match my brand's colors to house whatever quotes or photos I might decide to use.
If you use an overlay for quotes the way I have here, you'll want to make sure to set the transparency low enough so you can see the pattern beneath it.
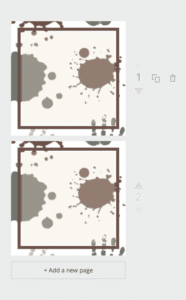
When you're ready, click on the small “Copy Page” icon over on the right-hand side of your image. That will create an exact copy of this image, and place it directly below (but still in the same file).
Then swap out the background image for the next one on your list (which should be numbered 8).
Be sure to upload your logos and anything else that you might want to include on these images. Then, keep repeating the process:
- Duplicate the page
- Replace the background with the next photo in line
Canva allows you up to 30 pages in a single file. This means you can have 30 backgrounds set up and ready to go. Just plug in your quotes or photographs where you want them.
When it comes time to download and actually use your photos, you can either download them one at a time or all together as a zipped file.
Finally, get out there and post your cool new graphics!!
Everyone will think you sent hours and hours creating this background when really PhotoShop did most of it for you.
What do you think? Simpler than it looks right? Is this something you think you want to try for your Instagram account?













Love this oh my yes i do Thank you for sharing
Thank you!! I’m so glad you found it helpful!!
This is awesome!! Thank you so much for sharing now to convince my son to let me use his photoshop lol!!
Bwahahaa!! Glad I could help!! 🙂
Finally! Now I can up my IG game. Thank you!
<3
I told you I’d get this up for you sooner or later <3 Glad it was finally sooner.
Thank you for sharing! Very informative and seems pretty easy to follow along…..may be my push in the direction to get PS, because I’m not sure if I could recreate this elsewhere (at least at the moment)
Brilliant!!! Thank you! Exactly what I needed and extremely helpful.
Yay! You’re so welcome!