Looking for a creative way to use your Facebook messenger chatbot to send out content upgrades, opt-ins, challenges, and more? I'll walk you through step by step how to build a 5-part content delivery chatbot that you can use to do just that.
It seems as though chatbots are taking the marketing world by storm, doesn't it? They are everywhere. Yet I still see a lot of writers using them in much the same way they would use email. They go through all this trouble to get people to sign up only to use it as a big, spammy megaphone.
This is a waste for two reasons:
- ManyChat is extremely powerful, and can do so many things for your business. Choosing to use it to only send out promotional blasts whenever you have a new book for sale is like buying a new Playstation 4 just to play DVDs. Sure, it can do that, but don't you also want to play some of the games?
- Like any other social tool out there, messenger marketing works better when it is a two-way conversation. No one is signing up to listen to your sales calls all the time. Even the people who do sign up specifically to find out when something is on sale will tune you out eventually if all you do is ask them to buy stuff.
Just a big waste, right?
So you might be wondering: what else can you do with a chatbot?
Well, how about a content upgrade for your blog? Similar to how people can opt-in to receive your blog's content in a printable PDF form, except instead of downloading a PDF, they would get small, bite-sized messages that are interactive and easy to consume.
Or how about a challenge of some sort?
Once you know the basic setup of this 5-part content delivery chatbot, how it works, and have your first one set up, you could literally use it for just about anything.
(PSST, if you’re short on time and would rather just install a prebuilt template, we can do that too!! You can purchase this entire template, complete with a ready-to-use growth tool opt-in, for just $45. Just install, add your own messages, and you’re ready to go!)!

Why use a 5-Part Sequence for a Content Delivery Chatbot?
There are actually several ways you could build a content delivery chatbot. The easiest way would be to set up a new flow and simply add messages to the sequence, scheduling them to send out at certain intervals.
However, as I said earlier, messenger marketing works best when it is a two-way conversation. Those sequences are nice, but they are still (mostly) one-way unless you add in some interactive features (such as buttons).
And, unfortunately, if someone doesn't hit one of those buttons, then the entire sequence could be dead in the water.
With the 5-part sequence we'll be building today, we are eliminating the problem of the ignored or skipped button. We are also building in ways for your audience to interact with your chatbot, making it a nicer experience all around.
To Build this Engaging 5-Part Content Delivery Chatbot with ManyChat, You will Need:
- Content that you want to deliver
- A Pro ManyChat account
- Any integrations that you want to incorporate into your call to action at the end of your content (ie., your newsletter, your courses, your scheduling calendar, or another flow)
Here are the steps we are going to be doing as we set up your content delivery chatbot:
- Set up your integrations
- Build the flow in ManyChat
- Set up your Call to Action and Follow-up Expectations
- Set up the growth tool so people can opt-in to the 5-part content delivery chatbot
Step One: Setting up Your Integrations
Thankfully, ManyChat makes it really easy to integrate with some tools directly. If you are using either MailChimp or ConvertKit for your email marketing service providers, you're in luck. You can also integrate HubSpot CRM directly with ManyChat.
For other tools, you can use a tool like Zapier or Integromat to build integrations.
To reach the Integrations, first log into your ManyChat account, and then navigate to Settings:

In the top menu, select Integrations. You'll see Google Sheets is the first option available to you (you don't need Google Sheets for this chatbot, but it is a good integration to have, nonetheless):

From there, follow the on-screen instructions for setting up your integrations. You'll also need to go through the other tools to make sure any codes, links, or lists that you want ManyChat to connect with are set up and ready for you.
And finally, if you plan on sharing any graphics or diagrams, make sure you have those created before you start working on the Flow in ManyChat.
Step Two: Building the Flow in ManyChat
For the most part, this is going to be a nice and simply Flow.
Go ahead and navigate to Flows, create a new Folder for this sequence, and click on the blue button for +New Flow:

Give your Flow a name and, if you need to, switch over from the Basic Builder to the Flow Editor.
Now, don't worry about a greeting or an introduction in this part. Those are best left for your Growth Tools and your Welcome Messages.
Instead, start this Flow off by letting people know how they can get a hold of you. You can make it an email, a button, a phone number, or even a keyword that will notify you.
Chatbots are amazing, but they should be used to enhance your presence, not replace it. So make it easy for your audience to reach you when they want a human.

The next step is pretty simple: they click the button and you send a message containing the first part of your content.

One of the most important things to remember about building out a message flow with a lot of information in it is that people don't turn to messenger to read a blog post: they go to read messages.
That means keeping the messages conversational and short. If you have a lot of content to share, make sure you add in delays or other breaks in there to help make it easier to read.
And make sure the delays are long enough for the text: nothing is more annoying than trying to read a message on messenger and having to scroll back up because the message was too long or the next one came too quickly.
Now, instead of word-vomiting and sending everything all at once, I like to give the audience an option: they can choose to get more details about the information I've just shared with them, or they can move on to the next bit of information if they feel like they don't need any extra information:
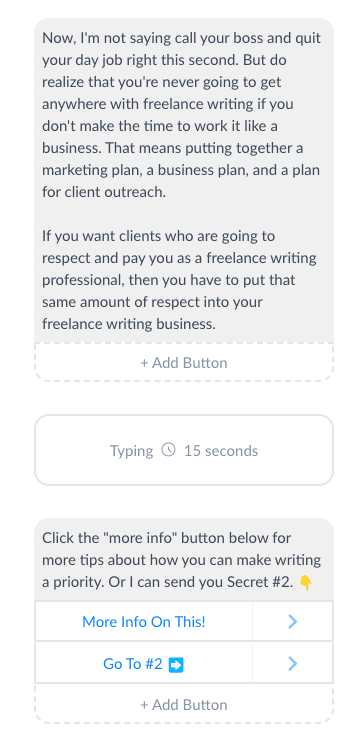
The benefit of doing this is that you aren't flooding your audience's inbox with a bunch of information they don't necessarily want. And not only are they engaging with your chatbot to get more information, but they get to ask for the information they want.
Much more like a conversation, right?
Now then, if they click on the “More Information” button, the next step is somewhat obvious: send them a message with more details, tips, and actionable steps from your content.
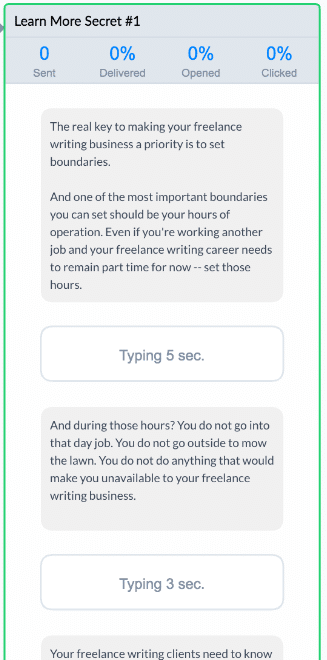
But if they click the button to get the next piece of content (Secret #2), then we want to run a couple of behind-the-scenes steps before we send that out.
First, we want to add in the ability to gently nudge — since life can happen at any moment and the audience's toddler can come in naked and screaming while painting poop on the floor, forcing your subscriber to put down the phone or step away from the computer (I may or may not be speaking from experience with this one).
So, for both buttons that should send the reader to Secret Number Two, add in an Action to tag them with a new tag: Secret 2.

Not only will this give you something to track on the back end so you know how far your audience is navigating through your content, but it will also give you a means of retargeting based on certain criteria later and this will give ManyChat something to check for in the next step.
At the bottom of the messages, click on the option to “Continue to another step”:
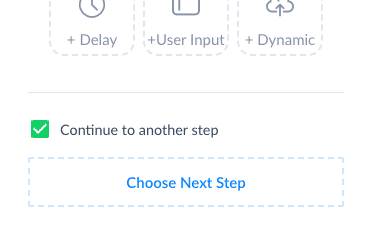
And the next step we're going to choose is for a Smart Delay:

What is a Smart Delay?
A Smart Delay allows you to add in a temporary pause within the message Flow before starting it up again.
In this case, we want to make sure the reader actually clicks the button to receive the next Secret. So we are going to use the Smart Delay to give them time enough to read the message and then check for that Secret 2 tag we just created.
So, in the Smart Delay settings, set the time for at least as long as needed to read the message, maybe a little longer. The default is one minute, but for things like this I usually change that to be 2-3 minutes. At the end of the Smart Delay, run a Condition:

In the Condition's settings, set it to look and see if the reader has had the Secret 2 tag added to them yet.
If they have, then you know they've clicked one of the buttons and they're ready for the next message. If they haven't yet, then you know they haven't clicked the button yet, so you're going to bump the message a bit with a friendly reminder:

Why a bump? For one thing, once a message has been sitting in the inbox for a while, it gets buried under other new messages.
And, once a person is pulled away from a message, it could be hours — maybe even days — before they remember about it again (again, I may or may not be speaking from experience here).
The point of the bump is not to be pushy, but just to send a gentle reminder about the content while simultaneously bumping your message back up to the top of the inbox:

And, of course, add a button they can click to go to the next secret (and get that tag added to them) on the bump.
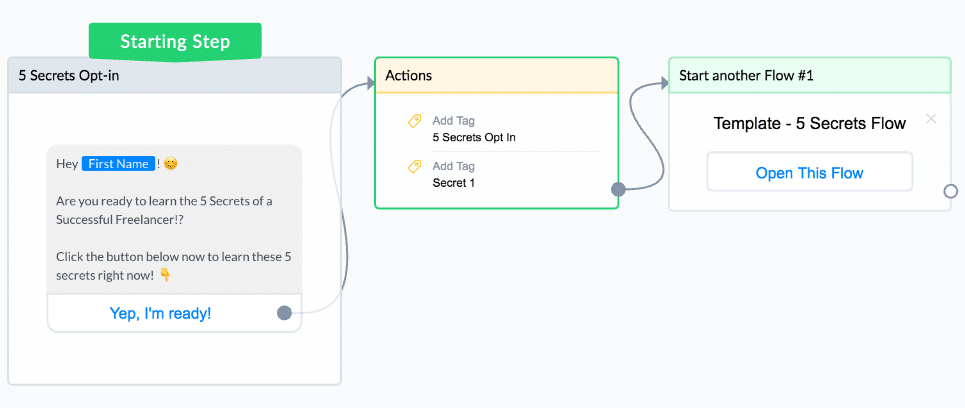
Once it's all built out, your Flow for Secret #1 will look something like this:

Now: rinse, lather, and repeat as necessary for each part of your content, making sure to add in those buttons and delays as necessary to make your content easy to read and engaging.
And you're all set! With all five (or more) parts written out, it's time for the next steps.
Step Three: Set up Your Call to Action and Follow-Up Expectations
At the end of the last Secret, it's time to put your strategy into place. And that means adding in your call to action. Once again, for the sake of making it a good experience for your subscriber, give them a choice:

First, let's set up what happens if they say No Thanks.
If they say No Thanks, then we want to leave them with information about how to get a hold of us later. And it never hurts to add in a button that allows them to subscribe to another Flow (like my Daily Writing Tips) or that allows them to ask you a question:

For each of these options, choose the action that makes the most sense:
- “Check out Courses” opens up a website which lists all of my available courses.
- “Daily Writing Tips” opens up a new Flow within my chatbot where they can receive motivational writing tips every day in their inbox.
- “Ask a Question” sends them a message asking what their question is so I can respond to it as soon as I can.
One important piece, of course, is that if you're going to have an option for people to ask a question, you have to make sure you see it (so you can respond to it later).
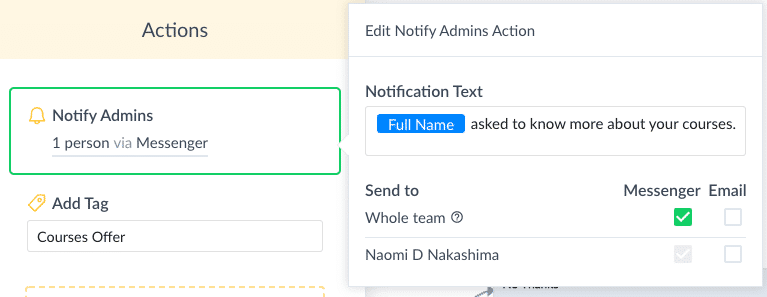
To make sure you don't miss a question, you're going to want to set up an Action so ManyChat will send you a notification when they click the button:

When you set the notification, you can set it to send to your email or to your messenger – whichever works best for you. If you have more than one admin on your bot, you can choose who receives the notification. You can also change the wording of the notification (I recommend adding in some information so you know what flow they are sending their question in from):

Of course, should someone choose to click on the button to go to my courses, I'm going to want to know about that, too. So I also added in a tag and a notification setting to that button:
And, of course, because there's always a chance that they might click the button to view information about courses but then get distracted or busy before actually having a chance to view the courses, I set up another Smart Delay – kind of like an abandoned cart notice – to remind them about the offer for the courses:

Now, of course, once they've gone to your site, presuming you have tracking and pixel tags installed correctly, you will be able to retarget them for your Facebook ads or Pinterest ads.
This is also a good time, should you want, to ask for an email address if you want to be able to add them into your newsletter list (using the integration you set up earlier).
Step Four: Set up the Growth Tool so People Can Opt-in to the 5-part Content Delivery Chatbot
The nice thing about building out the main Flow separately like this is that it leaves the possibilities wide open for your Growth Tool options:
- Ref-URL so you can share a link on your other channels or through email.
- Facebook Comments so you can use a Call to Action to have your audience comment on a specific post to get in.
- JSON Ads so you can run a paid campaign on Facebook.
- Chatbox so you can embed it onto your website and invite your website visitors to subscribe.
Whatever you decide, publish your new Flow and then navigate to Growth Tools. Click on the blue +New Growth Tool button to

Then go ahead and make your selection for a Growth Tool:
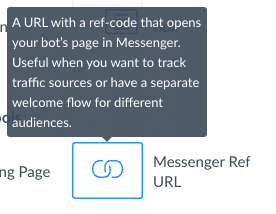
ManyChat will include a default message, but you'll want to go ahead and edit that so you can add in your own flair (and, of course, so you can include a button that will guide people to the full Flow).
This doesn't have to be anything fancy: just a quick reminder of what they signed up for along with a button to follow.
And, of course, tags (because I absolutely love tags):
The message(s) you include inside the Growth Tool are also the perfect spot to include any disclosures or other information that you might need your reader to know.
Once you're happy with how it all looks, go ahead and activate the Growth Tool using the slider up in the top right:

And you're ready to go!! Just share the link that ManyChat generates and as people click on it, they'll be able to subscribe to your chatbot and read you content.
How Might You use this 5-Part Series in ManyChat?
There are all kinds of ways you can use a series like this:
- Content upgrade for a blog post or ebook
- Exclusive guide
- Tips
- Training or coaching messages for a mini-course
- Introducing your clients to your available services
(PSST, if you’re short on time and would rather just install a prebuilt template, we can do that too!! You can purchase this entire template, complete with a ready-to-use growth tool opt-in, for just $45. Just install, add your own messages, and you’re ready to go!)!
Did you enjoy this article? Here are some more posts on messenger marketing you might like?
- The Complete Guide to Messenger Marketing for Writers (Updated for Changes in 2020)
- If You Have a Chatbot for Facebook Messenger, Here's What you Need to Know NOW (Updated for 2020)
- How to Set Up a Daily Chatbot Sequence With ManyChat And Google Sheets
- How to Create an Interactive Quiz for your Chatbot using ManyChat
- How to Set Up a Random Chatbot Sequence for Giveaways in ManyChat


