Disclosure: Some of the links on this post are affiliate links, which means I may receive a small commission if you click a link and purchase something I have recommended. While clicking these links won't cost you any extra money, they will help me keep this site up and running and keep it ad-free! Please check out my disclosure policy for more details. Thank you for your support!
Not long ago, I started seeing an interesting phenomenon taking over various websites: Spin-To-Win for a chance at a discount. If you haven't seen this yet, you can find an example of this over at Neil Patel's site. The concept is pretty ingenius — people love discounts. And people love having a chance to win something. So of course I thought…why not set up a random chatbot sequence that people can use to try to win a discount on my writing or editing services?
And to be honest, there's really no reason not to do this. Once the chatbot sequence is set up, it costs next to nothing for everything to work. So even if someone doesn't use the discount they've won to make a purchase, you're not out anything, really.
And, of course, if you've got it set up on a chatbot, then even if they don't purchase from you right then and there, they've still subscribed to your chatbot. The door is open to continue building that relationship.
In this post, I am going to show you step by step how to build a ManyChat chatbot sequence using the Randomizer that you can use to send your subscribers a random message (such as a discount offering or giveaway) of your choosing.
(PSST, if you're short on time and would rather just install a prebuilt template, we can do that too!! You can purchase this entire template, complete with a ready-to-use growth tool opt-in, for just $45. Just install, add your own Google Sheet, graphics, and offers, and you're ready to go!)!

Why use a ManyChat Sequence?
There are plenty of other ways you can set up an offering like this: text offers, a giveaway software like Rafflecopter, that Spin-To-Win wheel…
The list goes on and on.
But I prefer using the chatbot sequence because my strategy was to run a Facebook Ad advertising the chance for the discount. This way, it's all right there, in messenger. It's easy, it's convenient, and it keeps everything all in one place.
And anything that makes my clients' lives easier is a good thing in my book.
To Create a Random Chatbot Sequence in ManyChat, You'll Need the Following:
- A Pro ManyChat Account
- Google Drive (to house your Google Sheet)
- A program to create your offer graphics (I use Visme)
- A plan or strategy
Here are the steps we are going to be doing as you set up your random chatbot sequence in ManyChat:
- Set up your offers and graphics
- Set up your Google Sheet
- Set up the flow in ManyChat
- Connect the Flow in ManyChat to the Spreadsheet in Google Sheets
- Set up the checks and messages for subscribers who try to get more than one prize
- Set up your Growth Tool and Opt In messages
Step One: Set Up Your Offers
The first step to offering anyone anything is, of course, making the offers. So to begin, make a list of the types of offers you want to give away through the chatbot, and decide how they are going to work.
Here is a list of some of the offers I've made in the past:
- Free manuscript critique.
- Discount on formatting service with the purchase of editing service.
- Free one-on-one live coaching session (1 Hour).
- Free website audit.
- Free eBook formatting service with purchase of paperback formatting service.
- Free blurb and synopsis writing with purchase of novella-writing service.
- Free social media captions (30-count) with purchase of eBook-writing service.
- Free custom graphics pack with ManyChat sequence template purchase.
The real key is to make sure you only create offers you are willing to give away multiple times — don't promise a free manuscript critique if you don't actually want to give that away to several people. With this sequence, as you will learn, you can add weight values to your options, making some of them appear less often. But there is no rigging it – no picking your favorite or leaving a prize off. If you add it, then 1 or 100 people might win it.
So think carefully about your offers, and then make your list.
If you are going to need codes anywhere, make sure you create them.
And I recommend setting up a page that details exactly how this giveaway will be run as well as any other policies or legal disclosures you need to include. Messenger is awesome, but trust me when I say that no one will appreciate having all those disclosures sent to them through messenger.
Plus, having a page with all your terms and conditions will help protect you should you need it later.
Once that's set up, you'll want to create the graphics that go with your offer.
For static images, you can use any graphics program you want. I am using Visme because I like the easy interface, the branding capabilities, and the various options it offers (you can read my complete review of Visme and why I love it so much here).
First thing's first, log into your Visme account and create a new project. The ideal size for graphics in Facebook Messenger (specifically inside ManyChat messages) is 909 pixels wide by 476 pixels high – but you can technically make your graphic any size and ManyChat will do its best to adjust and crop without losing quality:

Now, since this is an exciting announcement, I want to keep the graphic itself really simple, with a clear call to action to click the link in order to redeem their offer. So to do that, I start at the menu on the left and go to Graphics >> Icons and Shapes:

As you can see, there are several shapes I can choose from. Go ahead and browse through the options (there are hundreds) until you find one you like. Then click to add it to your canvas:

Go ahead and click with your mouse on any of the block dots around the corners, then drag outward to make the shape bigger (inward if you want to make that shape smaller). You can also click in the middle of the shape and drag it around your graphic to place it anywhere you like.
To change the shape's colors, make sure you have the shape selected, then go to the menu at the top right of the editing window to see the current colors:
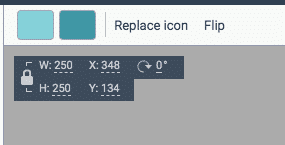
You'll then be able to select any color you like. If your color isn't shown, you can click on the + sign to add a new color via color wheel or hex code:
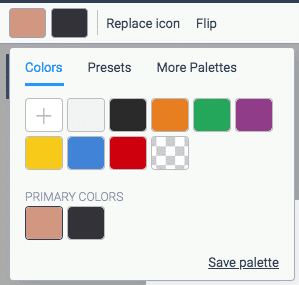
When all is said and done, here is the shape I ended up with — a sun graphic using the rose gold that is prevalent in my branding:

Of course, any words I place over this graphic are going to be hard to read.
So, next I'm going to use the menu at the top right of the editing window to change the opacity of my shape until I can barely see it — I want it to be there but not prevalent:

And my final result:

Now we just need the words.
Back over on the left-hand menu, navigate to Basics >> Header &Text:
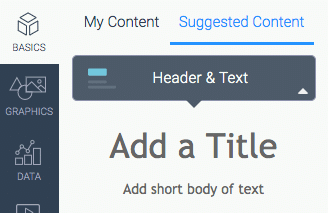
Visme already has some basic suggestions ready for you that if you click on, they will be added to your graphic. Or you can click on “Add a Title” if you don't see a template you like.
Go ahead and type in the text you want to use. Make sure to include a clear call to action such as “use this code” or “click the button” so your subscriber will know exactly how to redeem their offer right away:

Just as with the shape, there are some effects you can add to your text to help make it pop a bit more. Using the menu at the top-right, you can play with the text's opacity or (as I am going to do) add a drop shadow:

And, of course, you'll want to upload and add your logo or website address – just in case:

Once you're happy with your image, click on the Download Button:

Then choose the format you want to download (if you are on the free Visme account, you are limited to jpg downloads only. But since this is a static image being sent through messenger, jpg is just fine):

Voila! Repeat this process as many times as you like for each offer.
Another option would be to use GIFs instead of static graphics.
GIFs are so much fun. And if you happen to make your own GIF, that could be an awesome way to add some personality and branding to your offers.
But, if you don't have the time or equipment (or desire) to create your own GIFs, you can always hit Google to find them for you. Just make note of a couple things if you do this.
First, make sure you are filtering so Google shows you only those images that have been labeled as available for reuse. This label means you have permission to use the image in a commercial setting:
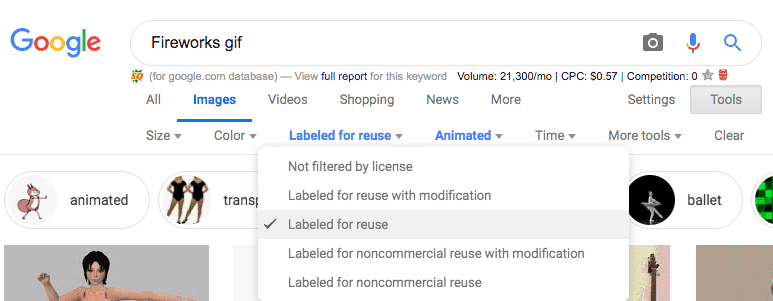
When you find an image you like, click on it to expand the listing and Google will tell you where it pulled the image from.

And if you really want to be sure that you can use that GIF in your offers, click to visit the site and look for anything that says “License” or “Usage Rights” or “Content Policies.” Some sites even have them listed under their Terms and Conditions page.

If you can't find usage rights for the GIF you want to use anywhere on the source site, then use your best judgement as to whether or not you want to use that GIF. The safest bet is, if you have doubts about whether or not you should have permission to use it – then don't use it. After all, there is just as big a chance that the image was labeled incorrectly when Google pulled it up as there is that the site simply forgot to list their usage rights.
But that's a judgement call you'll have to make.
Once all of your graphics (or GIFs) are in order, it's time to set up your Google Sheet!
Step Two: Set up Your Google Sheet
We're setting up the ManyChat integration with Google Sheets to help with record keeping for the offers being given away. We're going to tell ManyChat to send the winner's information to the Google Sheet (so we have it available for follow up or bookkeeping purposes), and later use it so ManyChat can check and see if the subscriber has redeemed their offer.
Technically, you could build this entire chatbot without using Google Sheets at all. You could use Zapier and connect to your favorite service and keep your records that way. Or you could choose to keep a manual record of everything.
But I like the automation of this, and the fact that ManyChat now integrates directly with Google Sheets without needing a third tool. And that integration goes both ways.
So, first thing's first, log into your Google account and head over to Google Drive to create a New Blank Spreadsheet:

Then set up your headings (so ManyChat will know what to look for and where to put things):
- Subscriber Name
- Email Address
- Offer Received (What they won)
- Date the Offer was Received (if you want it to expire)
- Offer Redeemed
- Date the Offer was Redeemed

Not too hard, right?
Finally, you're going to want to log into your ManyChat account and make sure you have Google Sheets connected.
Navigate to Settings >> Integrations and choose Google Sheets (the very first option) and follow the on-screen instructions to connect your account:

And that's it!!
Time to build the bot.
Step Three: Building the Sequence in ManyChat
From your ManyChat account, the first thing you're going to want to do will be to go to your Settings >> Custom Fields:

Then, click on the blue + New Field button at the top right to create a new User Field:

This is going to be where we store the offers once the subscriber wins something. So name it something appropriate and go ahead and fill in the description so you can identify it easily later on:

You're also going to want to create a User Field so ManyChat can record and store the actual date that your subscriber received their prize:

The third User Field you want to create will be for whether or not your subscriber has already redeemed the offer they've won:

You also want to be able to record the date on which the subscriber redeemed their offer (if they did) to another field:
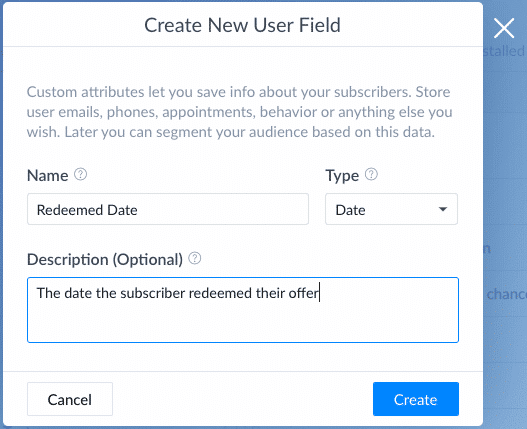
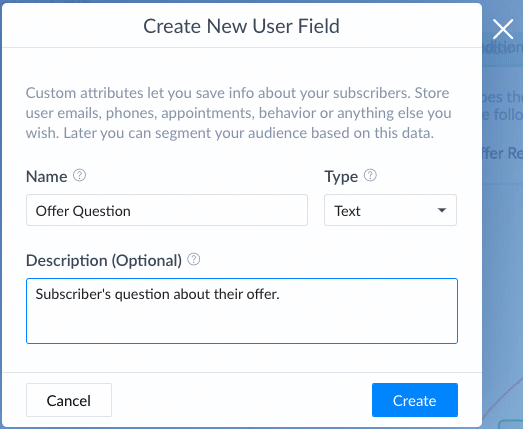
And the last User Field you're going to create is a text field for any questions your subscriber might have. This is completely optional, but I always like to have a way for my clients to ask me questions about my services or any offers they may have received (or if they are having trouble redeeming it for some reason). And having this field makes it really easy for me to find:
Next, go to your flows. I like to keep my flows organized, so my first step whenever I create anything new is to create a new folder and name it after the flow I am about to create:

Then click on the Blue + New Flow button over in the top-right to get started:

And give your Flow a name:

Then we are going to click on the option to Go to Flow Builder:
Can you build out this sequence using the Basic Builder?
Yes, technically you can. But the Flow Builder gives you more information at a glance and allows you to see potential errors or dead ends that the Basic Builder can miss.
If we were just trying to build a super-simple chatbot sequence with one or two messages, then the Basic Builder would do just fine. But with the ManyChat Randomizer, the Flow Builder really is going to be the best option.
Now, ManyChat is going to start you off with the default “Send Message” option for your flow. We're going to change that later, but for now, let's go ahead and rename that to “Get Started.”

Then I want to add in my image by clicking on the + Image button:
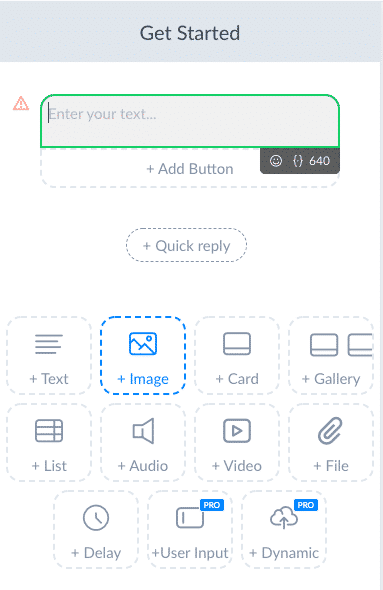
And finally, I want the image to come before the message itself (when the image comes after the text, it pushes the text too far up, making the subscriber have to scroll to read it – which I find annoying and not at all user-friendly).
To move the image, click on the dual-ended arrows on the right-hand side and drag it to the top:
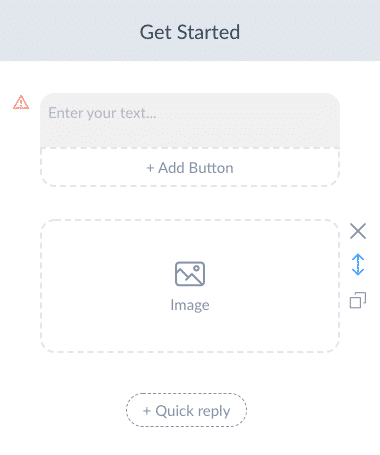
Now, for this first image, it can be anything you want. This is the first message that your subscriber will receive after the Growth Tool Flow is complete. So it doesn't need to be anything more complex than simply saying hi:

Then we're going to type in the actual text of the first message.
Since I want to also collect their email address, I am going to start off this flow by asking for their email, which means replacing the generic message with a User Input message:

Then you just need to type in the message. You want to make sure that you are friendly and clear, but try to keep the message short and sweet. If it goes too long, it gets hard to read (or it forces the subscriber to scroll up to read it which, again, can be annoying). Don't worry about introducing anything or explaining how the game works — that will be taken care of when we create the Growth Tool later:

When you're ready, click on the “Free keyboard input” button to configure that for an email address.
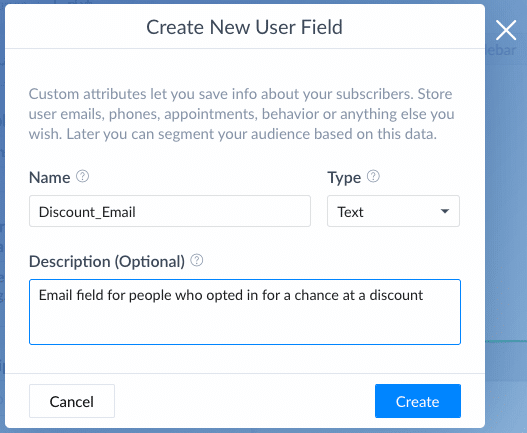
You want to make sure the type is set to “Email” so ManyChat knows to check for a valid email address. I also deleted the “Skip” option so people won't be able to skip this step. And I told ManyChat to save the email address to a new User Field named “Discount_Email” (this way I can keep them segmented from people who have send me their email address for other reasons):

When you create your new Custom Field, ManyChat will ask you for some details about that field. You can be as detailed as you want to be about it:
If you have integrated your email marketing service provider (EMSP) with your ManyChat account (currently, they integrate with MailChimp and ConvertKit – but I'm sure others are on the way), you'll want to make sure that it pulls this email address over to add your new subscriber to your email list.
And, I know it goes without saying, but if you do this, please be sure you remain compliant with all privacy laws when it comes to collecting those email addresses. If you are going to be sending them marketing materials after delivering their confirmation, you have to ask for their permission first.
Make sure you check the option at the bottom of your message to “Continue to another step”:

This is where the magic is going to happen: the Randomizer.

By default, the Randomizer gives you two options, each with a 50% chance:
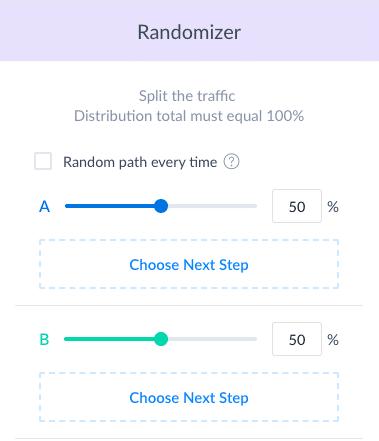
Makes sense, right?
You can add as many options as you like, and give each option a different value, as long as everything adds up to 100%:

In this case, the 4% could be your “big one” — the prize you don't want everybody to win. But, like I said, if it's in there, there is a chance that more than one person could win that big prize. So if you don't want to give it away more than one time, don't add it as an option to the Randomizer.
What you could do in that case would be to leave all the percentages the same, and then everyone who enters here could also be entered into a drawing to win the Grand Prize (which would be delivered via email):
The next thing we want to do is make sure ManyChat makes a record of whatever offer the subscriber is about to win before sending them their prize. So, for each variation within the Randomizer, we're going to set the next step to “Perform Actions”:
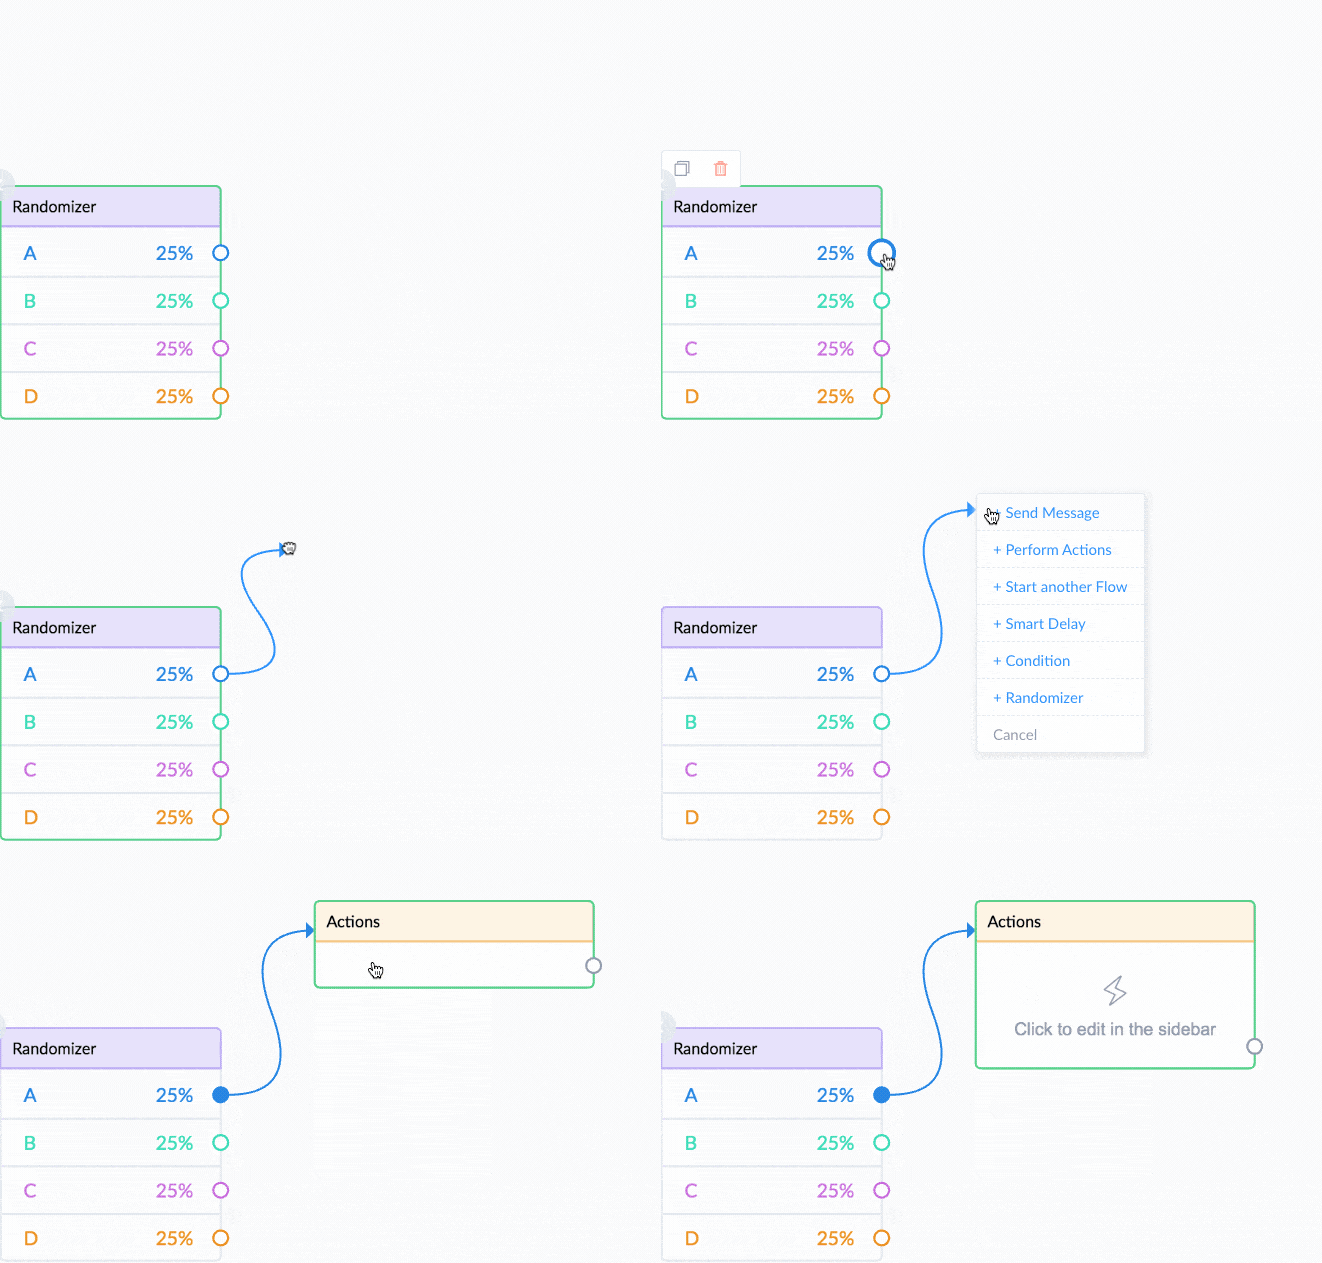
Set the action to “Set Custom Field”:

Then select the Custom User Field you created at the very start and type in what your offer, prize, or discount will be:

Repeat these same steps for every variation in the Randomizer, typing in a new offer for each one.
We also want to make sure that ManyChat tags this subscriber as someone who received an offer. This will be important for later on when we want to check and see if they are trying to go through again for another offer, or if we want to retarget or follow up with them for any reason. Having the tag will make that really easy:

And finally, we're going to want to make sure we record the date the subscriber won.
Add a third action to Set a Custom Field. Then choose the Date Field you created earlier and set that to “Date of the Action”:

Then, go ahead and tell them what they've won!
Following the action, set a new Message:

And go ahead and add in your graphic or GIF as well as your message (I like to add in a Delay just to add a little bit more suspense):

Now that the bulk of the flow is set, the next step is going to be to connect it to the Google Sheet you created earlier so we can add the finishing touches.
Step Five: Connect the Google Sheet to your ManyChat Flow
At the bottom of your last message, go ahead and check the option to “Continue to another step”.
Next, set up a step for “Perform Actions” and this time the action you select is going to be “Google Sheets Actions.”

There are two types of Google Sheets Actions:
- Insert Row tells ManyChat to send data out to Google Sheets and save it as a new entry.
- Get Row By Value tells ManyChat to pull data out of Google Sheets to use internally.
For this step, you want to Insert Row:
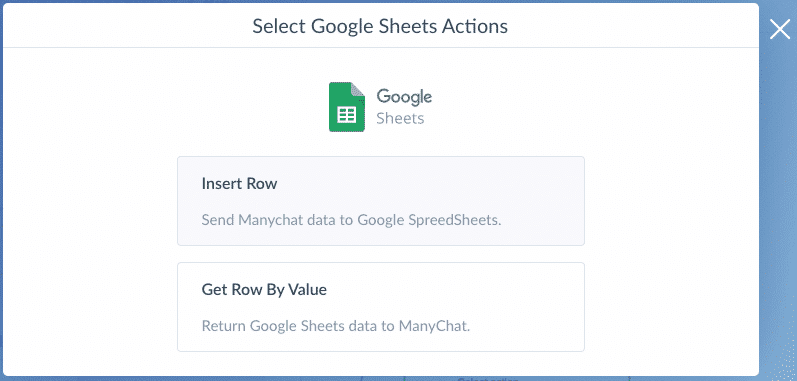
Follow the on-screen instructions to choose the right sheet and map out all the fields to the different columns in the spreadsheet:

Now that part is all done!!
Your subscriber had a bit of fun, won a prize, and you have a record of it saved in Google Sheets for your bookkeeping.
Now all you have to do is update the Google Sheet in the appropriate columns when your subscriber redeems his or her offer (that is going to depend on your other systems, as that happens outside of ManyChat).
You can integrate your other system to record this information automatically into the same Google Sheet (recommended) or you can update their redemption manually – whichever is easiest for you.
But, earlier I said we were going to want to change that first step from being a message. That's because at the very beginning of this flow, the first thing we want ManyChat to do is to check to see if the subscriber has already received a discount offer and, if so, whether or not they've redeemed it.
So, back to the beginning! Double-click somewhere in the space before that first message to bring up the menu and choose Condition:

And set that Condition to check for that Tag you created earlier:
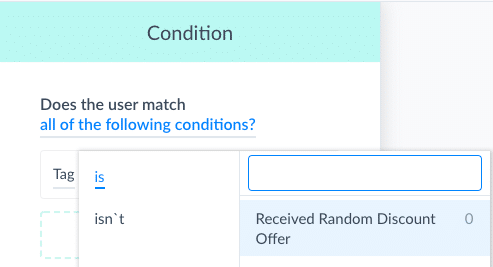
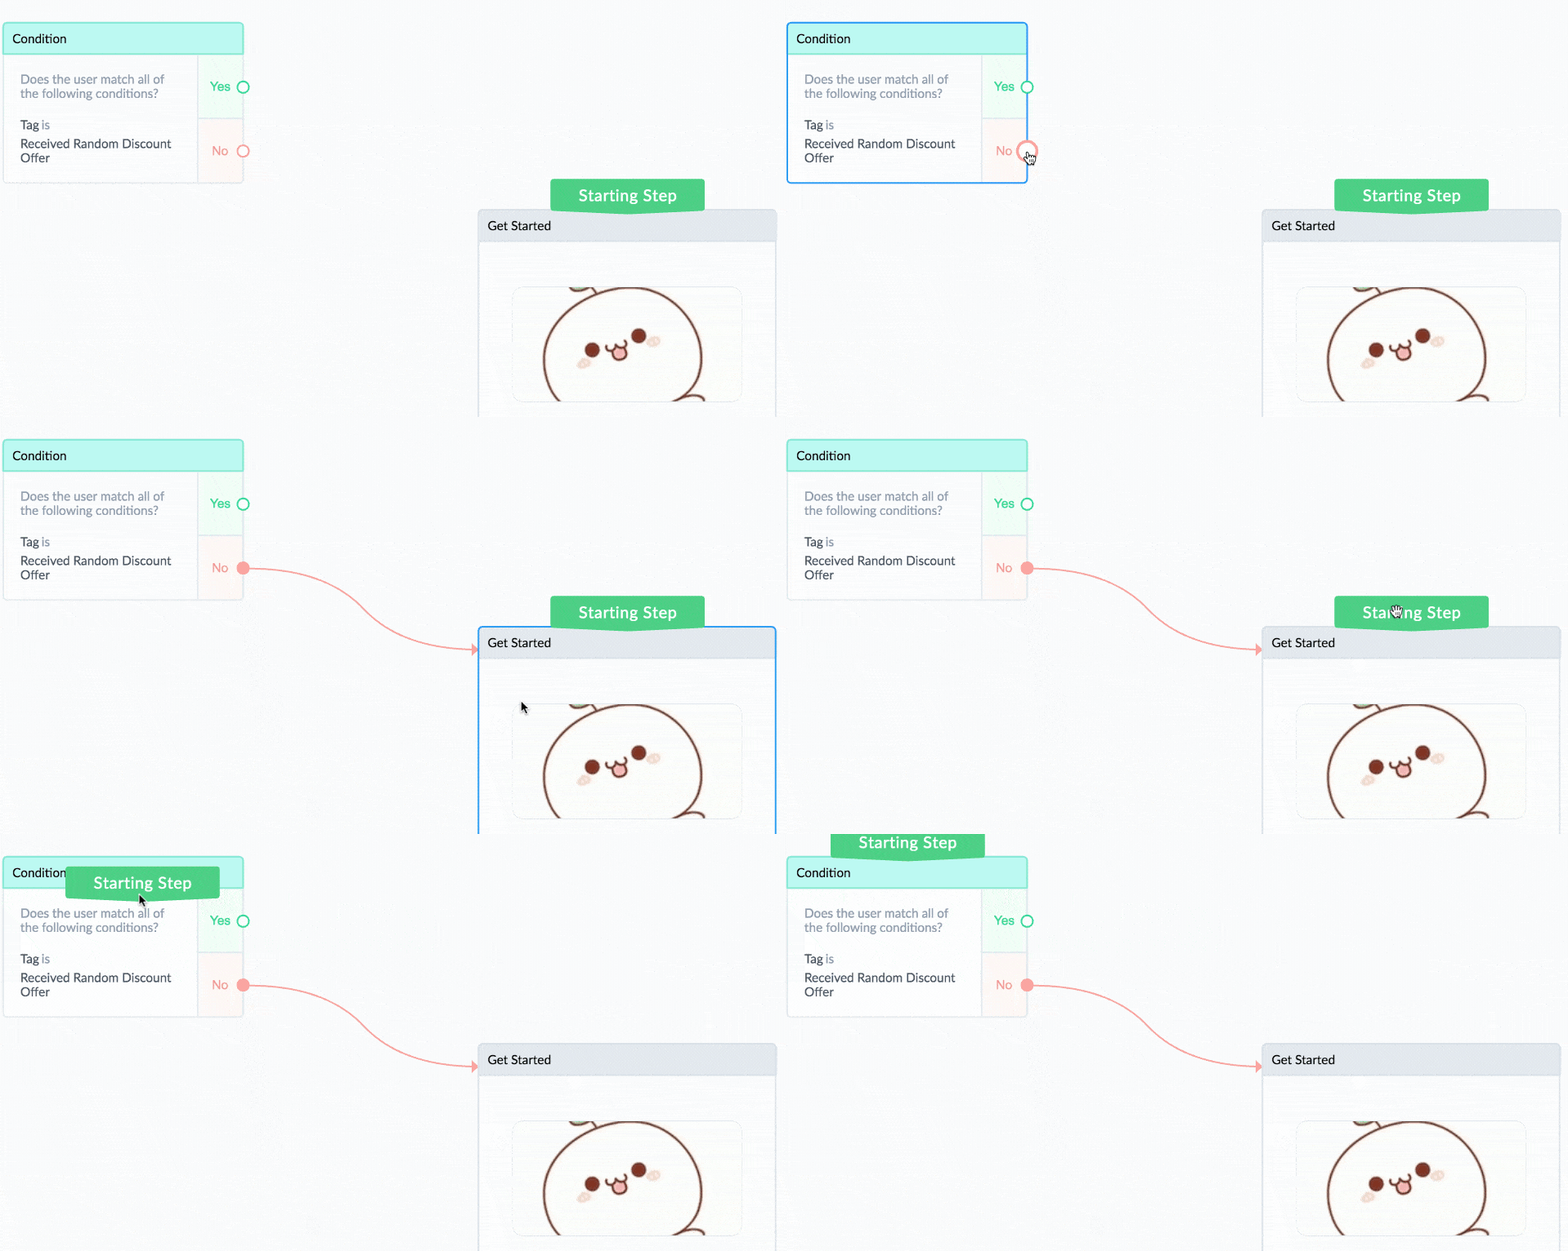
The Condition is going to have two options: yes or no. If the subscriber does not already have that tag, then they will be sent the new message to try their luck. So go ahead and connect the “No” to that message and then drag the green “Starting Step” flag over to the Condition to make that Condition the new start:
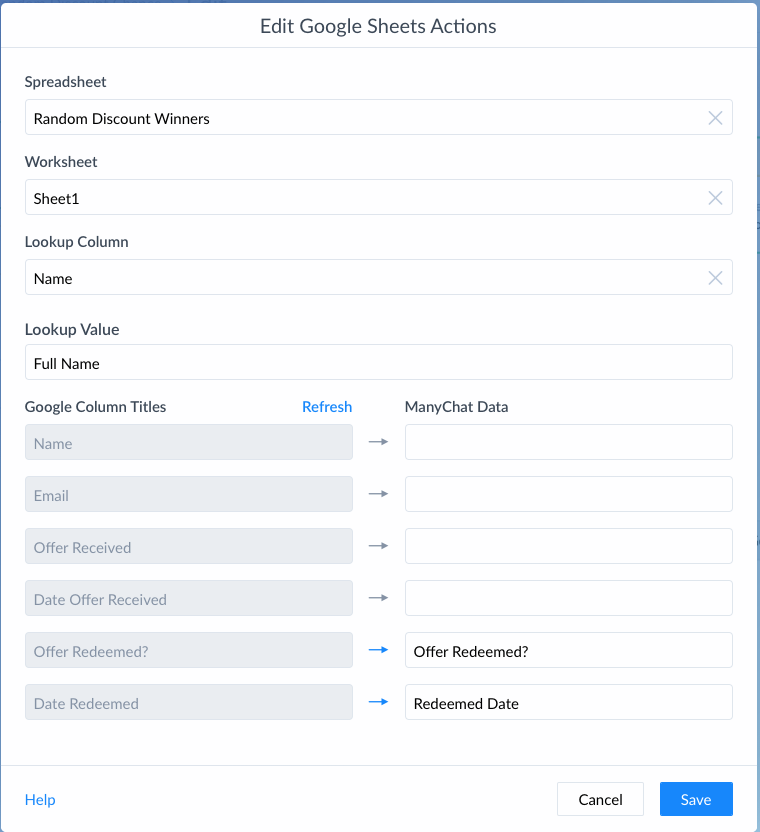
Now, if the check says that the subscriber already has the tag that they've received an offer, you'll want to pull that information back from your Google Sheet. And that means setting up a Google Sheets Action. Only this time we want to look them up in that spreadsheet so we can find out whether or not they've redeemed their offer. So, follow the on-screen instructions to choose your Google Sheet and look up the subscriber by name, then map the two redeemed columns in the spreadsheet to the correct User Fields in ManyChat:
Next, we want ManyChat to check to see whether or not the subscriber has redeemed their offer, which means setting a new Condition:

If they have not redeemed their offer, send them a new message reminding them what the offer was that they won, when they won it, and a link to let them go ahead and redeem it. For messages like these, where I am pulling in different fields, I like to add a delay to the beginning to give ManyChat a chance to catch up (and to make sure I'm not accidentally sending out too many messages all at once):

Should anyone have a question, send another message with the User Input option and save their question to the Offer Question User Field you created earlier:

If you're like me, you also want to make sure you don't miss when a customer has a question for you. So whenever I have any sort of question field that a subscriber can type into, I always set it to notify me right away.
To do this, click on the button to Perform Actions, and choose Notify Admins. Then select which admins will receive the notification, how the notification will be sent, and what the notification will say:

If the subscriber did already redeem their offer, then you'll want to send a different message reminding them of what it was and when it was redeemed:

Same thing as before, keep a delay near the beginning of the message to help keep things running smoothly, and give them an option to ask a question (just in case).
And that's it! The entire flow!
Go ahead and test it out by clicking on the Preview Button. Double check your messages, graphics, and proofread everything. And when you're happy with it, go ahead and click on the blue Publish button to make it live.
Then, we'll work on the Growth Tool you'll use to get people into this Flow.
Step Six: Set up Your Growth Tool and Opt In Messages
One of the things that makes ManyChat so powerful is the variety of Growth Tools it offers you to help get people signed up for your chatbot.
This is also one of the reasons why I like building out the bulk of the flow first, and the Growth Tool separately. This way, I can choose any Growth Tool I want for any occasion:
- Use a Scan code for printed flyers, brochures, or other materials you might hand out to people.
- Use a JSON ad to run a paid campaign on Facebook.
- Use a Customer Chat Box to embed an invitation on my website.
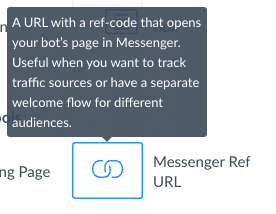
I am going to show you how to use one of the simplest Growth Tools: the Ref URL. So, first, navigate to Growth Tools and click on the blue + New Growth Tool button in the top right:

The Ref URL Growth Tool creates a nice, simple link that you can share with people via digital means, such as adding it to a website or blog post, using it in an email, or even adding it to a social media post on one of your other channels.
Now, because I create so many chatbots (like, all the time) I like to name my Growth Tools after the flow they are going to be connected to. That way they'll be easy to find and tweak later if I need to:
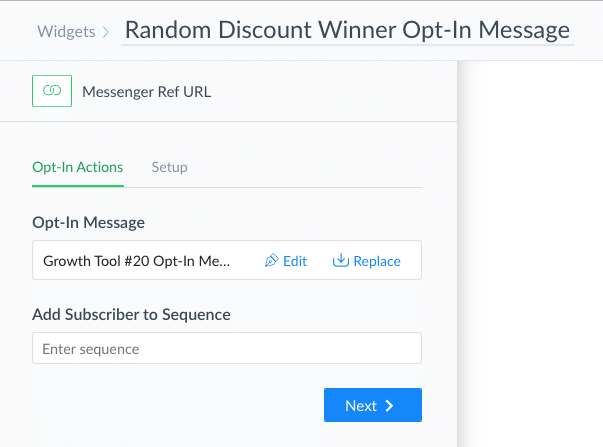
When you first choose your Growth Tool, ManyChat will fill it in with a default “hello and welcome” message. You can use that if you like. Or you can click on the Edit button and write in your own (better) message.
This is the perfect spot to let the subscriber know what they could win, how to play, and any rules or disclosures you may have:

The button for the Official Rules should link to wherever you have your terms and conditions written up.
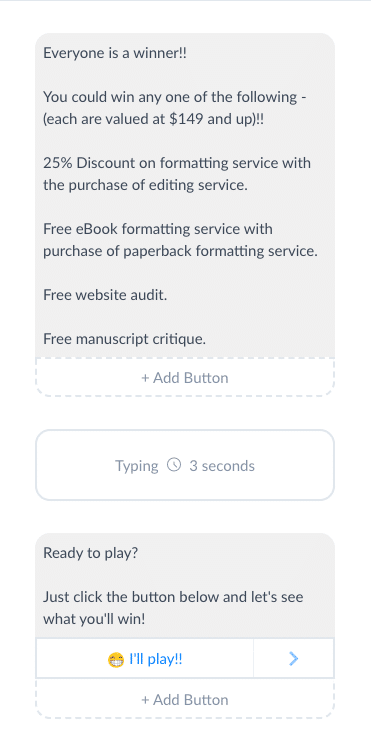
The other two buttons are pretty self explanatory. If they want to know what the prizes are, send a message with the prizes, and then add in a button that will start the Flow you've just created with the actual game:
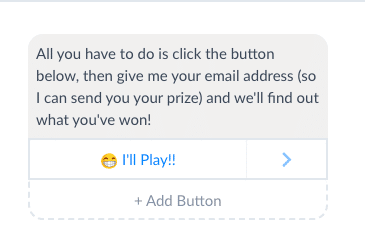
And if they want to know how to play (because some people don't trust simple), send them a message that will explain how the game works and a button to open that Flow:
When you're ready, select the Flow you want the Ply buttons to connect to:

And you're done! Can you believe it?
Your random chatbot sequence is ready to be used for giveaways, messages, and fun
What's more, you have a fun way to introduce your subscribers to your products or services and opt-in to your chatbot.
And, don't forget, you also have their email address now. Go to your email marketing service provider and set up a series of autoresponders there, too, to help your new subscriber redeem their offer and invite them to receive new offers from you in the future.
(PSST, if you're short on time and would rather just install a prebuilt template, we can do that too!! You can purchase this entire template, complete with a ready-to-use growth tool opt-in, for just $45. Just install, add your own Google Sheet, graphics, and offers, and you're ready to go!)!
Did you enjoy this article? Check out these other tutorials on ManyChat and messenger marketing:
- The Complete Guide to Messenger Marketing for Writers (Updated for Changes in 2020)
- If You Have a Chatbot for Facebook Messenger, Here's What you Need to Know NOW (Updated for 2020)
- How to Set Up a Daily Chatbot Sequence With ManyChat And Google Sheets
- How to Create an Interactive Quiz for your Chatbot using ManyChat
- How to Set Up a Random Chatbot Sequence for Giveaways in ManyChat


