Looking for a fun, easy way to interact with your clients or prospective clients? Interactive quizzes are an effective way to build brand awareness and generate leads.
And since Facebook is more about connection than it is about content, why wouldn't we want to leverage that with an interactive quiz?
Plus, your chatbot is the perfect medium for an interactive quiz. It's mobile, it's easy, and it allows you to connect in a more intimate setting (even though it is on a mass level).
So, I'm going to walk you through step by step how you can leverage the future of Facebook Messenger Marketing and create an interactive quiz using ManyChat.
Why Create an Interactive Quiz?
Remember when Teen Beat Magazine would ask us questions so we could figure out our ideal hair type? Or when Cosmopolitan invited us to find our flirty style? Since the dawn of advertising, interactive quizzes have a long history of drawing in readers.
We love them because they don't feel like marketing. The mindset behind a quiz is that you aren't learning about the company who is giving you the quiz — but you're learning more about yourself.
And we all want to learn more about ourselves.
Always.
And quizzes are a great way for you to learn more about your clients' needs as well. You can uses an interactive quiz to:
- Determine the type of editing they need,
- Help clients sort through your services or offerings,
- Plan a new project, or
- Just plain have fun.
(PSST, if you're short on time and would rather just install a prebuilt template, we can do that too!! You can purchase this entire template, complete with a ready-to-use growth tool opt-in, for just $45. Just install, add your own questions and answers, and you're ready to go!)!

To Create an Interactive Quiz for your ManyChat Chatbot, you will need the following:
- A Pro ManyChat account. If you want to try to build out a quiz using a free account, you can, but your options would be limited to only the three buttons on any question, and you would have to set up multiple Flows and sequences.
- The questions, answers, and general path or calculations that quiz-takers would take to get those answers
- If you want to use the Share card to help people share your quiz, you'll need a graphic with a call to action. optimal size is 909px by 476px.
Here are the steps we are going to be doing as you create your interactive quiz:
- Make up a plan for your quiz.
- Set up your Custom User Fields.
- Set up your Growth Tool.
- Create the Quiz.
- Create the Results Messages.
- Create your Call to Action.
Step One: Make up a Plan for your Quiz
This might seem like a bit of a given, but before you can create your quiz, you're going to want to know what your audience wants to be quizzed on and how to deliver it.
Do you want to do a simple trivia game? Test their knowledge on a particular subject? Or help them make a decision with something?
Your answers to this will determine some of the differences in the test itself, such as the types of conditions that we will be setting up. So take some time to think about what you want to quiz your subscribers on and how you want to handle the scoring.
You can see how I brainstormed my chatbot quiz below to help people determine what type of freelance writer they should be. In a quiz like this, there are no wrong answers, but rather it's taking their preferences and strengths and matching them up against the different types of freelance writers.

If your quiz is going to run any calculations, make sure you figure out what those calculations are going to be before you start building. Trust me, getting halfway through building the test and then finding out you have to start all over again to make room for a calculation is just as frustrating as it sounds.
You will also want to decide what it is you want people to do after taking your test. Because this is being built in Facebook Messenger, you don't want to give people two or three different things to try and do after they take your test. So think about your strategy and how you want the test to end. Do you want them to:
- Sign up for your email list?
- Check out a website?
- Share your quiz bot with someone else?
- Buy something?
Your strategy is going to determine how you close out your test when we get to that point.
Step Two: Set up your Custom User Fields
Next, it's time to create a few new Custom User Fields. Exactly which ones and how many are going to depend on the type of quiz or test you are creating and how you want to handle scoring:
- For simple tests with few calculations (such as “how well do you know this character” tests), you'll need one user field, titled “Score.”
- For more complex tests with a few calculations (such as “what type of writer are you” tests), you'll need one user field for each question, plus one user field for the score (which will be a total of the other fields).
To create your Custom User Fields, log into your ManyChat dashboard and go to Settings:

And then select Custom Fields:

For the question fields, you're going to want to make sure to set them up as Text Fields. This will let ManyChat know how to store the data that gets entered into that field.

For your quiz score field, you will want to make sure the Custom User Field you create is a Number field.

Step Three: Set up the Growth Tool
Before we start building the actual test, we're going to set up the growth tool. From your main settings, click on Growth Tools:

And then select the + New Growth Tool button in the top right:

You can choose any type of Growth Tool you want.
For my quiz, I chose the Ref URL, because I want people to share the quiz when they are done. A Ref URL produces a link that people can share so their friends can take your quiz.

Next, make sure you name your Growth Tool widget and Opt-In message. Otherwise you'll end up with the default name like “Growth Tool 23” and “Optin Message 24.” And that gets harder and harder to keep straight when you have a lot of sequences and flows going on.
Next, click on the “Edit” link to make any changes to your message:
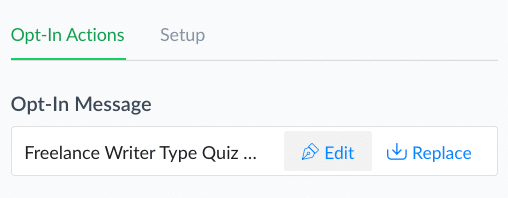
Then of course, go ahead and write out your message. Remember, most people will be viewing this on their Facebook messenger, so you'll want to be as concise as possible. If your message is too long, then they'll be forced to scroll back up to the top to read it, and that gets annoying.
You'll also want to set up any expectations, give your disclaimers, and anything else you feel your audience might need.
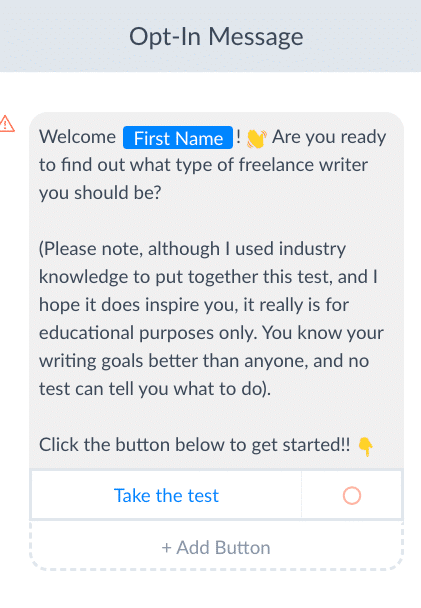
Now, I want the chance to be able to use different growth tools for this quiz. For example, one month I might want to place it on my site, and another month I might want to place it on my main menu or place an ad or something else. So rather than building out the entire quiz here, I'm going to set the button to open a new flow.

Obviously I can't specify which flow yet, because you can only choose a published flow. So for now, make sure your growth tool is saved. There will be a small alert notice letting you know that you can't publish the tool until you specify the flow.
But we'll do that after we build the flow.
Now, I could have built the test first and then gone back and built the Growth Tool. And there's no real reason not to do it that way. But, I chose to do it in this order so that I could get that URL to use when I close my quiz.
Step Four: Create the Quiz
Now the fun part: setting up the actual quiz!! So, questions in hand, it's time to set up that flow.
I like to keep my flows organized, so I always create a new folder whenever I want to start on a new project:

Then, click on the blue + New Flow button at the top right to create the new flow.

And then go ahead and set up your first message. For this, we want to use the User Input Option. This option tells ManyChat to stop and wait for the receiver to respond the your message before continuing on:

And set the input type to “Multiple Choice.”
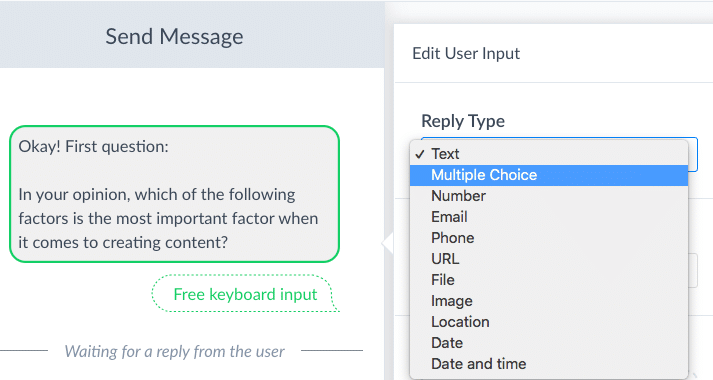
And finally, tell ManyChat where to store that answer by choosing the corresponding Custom User Field we set up in Step Two:

This will be important when you want to run your condition checks later on in the flow.
You will also want to delete the option where it says to “Skip.” If you leave the option to skip in tact, then people will be able to skip the question and doing so will stop the test in its tracks (not to mention messing up your calculations):

Then it's time to start typing in your options. The Quick Reply buttons only allow you up to 20 characters, so you'll need to work out a way to fit your options into a very small space.

Now, we could have chosen to send a plain message with Quick Reply buttons and then set each button to go down a specific path. But the reason you want to set up your questions as User Input is so that you can run a Condition so the ManyChat flow can do the calculations for you.
So, once ManyChat saves their answer to the corresponding Question User Field, it's time to tell it what to do next. Scroll to the bottom of the edit window and check the box that reads “Continue to Next Step.”
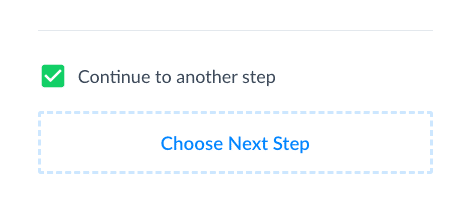
Then click on the “Choose Next Step” button that appears and choose “Condition.”

You're actually going to set up a series of conditions that will go something like this:
- Check, is the answer Option A? If Yes, take an action; if no, run another condition.
- Check, is the answer Option B? If yes, take an action; if no, run another condition.
- Check, is the answer Option C? If yes, take an action; if no, run another condition.
- Check, is the answer Option D? If yes, take an action; if no, run another condition.
- Check, is the answer Option E? If yes, take an action; if no, run the first condition again.
Believe me, this is all going to make sense in a minute.
So, first, set the check. You're looking for whether or not Question 1 equals whatever your first button was.

Make sure when you type in the answers that they match exactly how you typed them onto the buttons, or else the condition will always come back as false.
Next, tell ManyChat what to do if that check proves to be true. So click on “Choose Next Step” under the “Yes” option and choose “Perform Actions.” Then click on the “Choose Next Step” button under the “No” option and choose “Condition.”

When you click on Perform Actions, this is where you're going to tell ManyChat what calculation to start making for the quiz.
Next, set up the new condition.
In a quiz like this, each answer is assigned a value between one and five. If you only have three options, then you might want to assign each one a value between one and three, or count by fives, or some other value depending on how your quiz will actually run.
To set that value, choose “Set Custom Field” and then choose your number field for the Quiz Total:
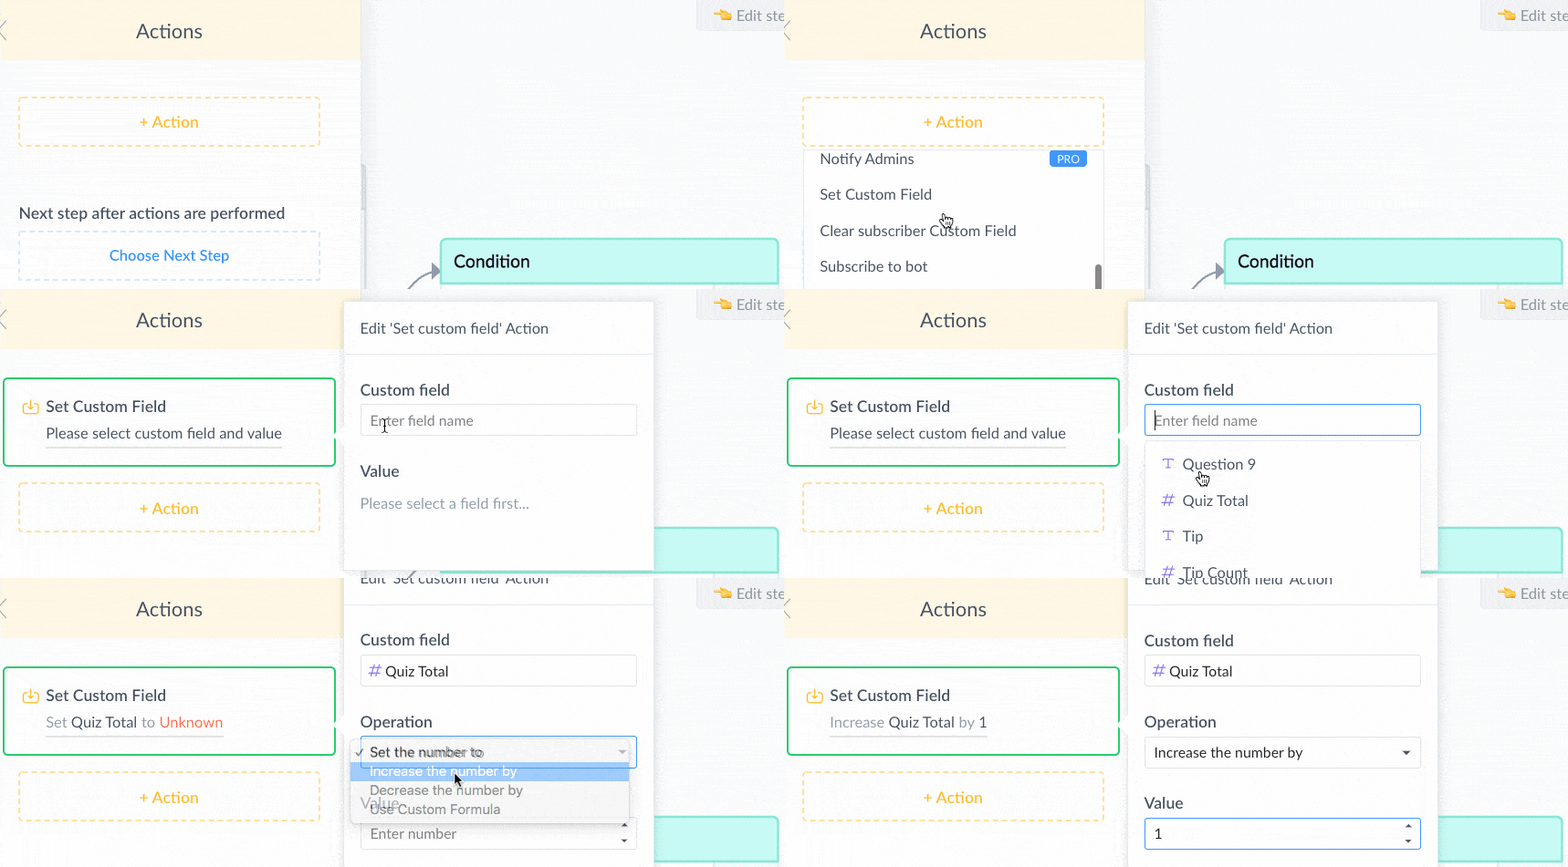
Rather than telling ManyChat to set up a value in the Quiz Total, you're going to tell ManyChat to add a value to the Quiz Total based on the answer. Obviously, the value amount you type in there is going to depend on the value you've assigned to your answer.
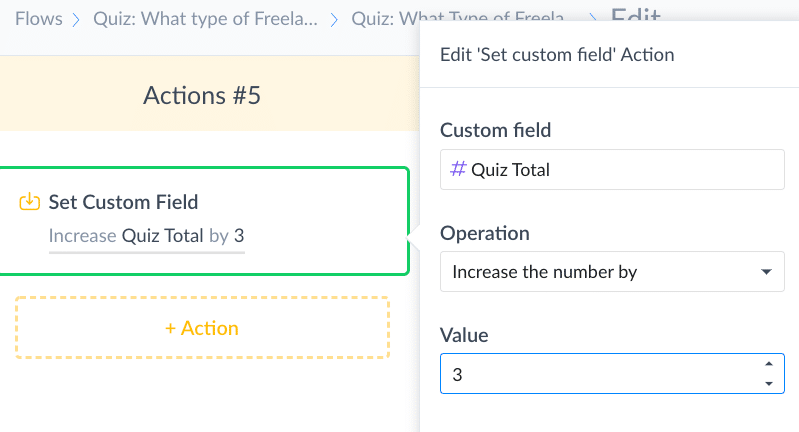
With that done, it's time for ManyChat to run the next check.
This will follow the exact same process:
- Check that the value in the Question 1 Custom Field is equal to the value in your second button.
- Under “Yes,” select “Perform Actions” and set the Quiz Total number field to add a value based on the answer.
- Under “No,” select “Condition” and move to the next check.
Once you've set up your entire series of conditions and the subsequent actions, your flow will look something like this:

You'll notice that last Condition doesn't have an option for the “No” attached to it yet. That's because by the time ManyChat runs through all these checks, there should be no way that becomes an issue. And, technically speaking, ManyChat will allow you to save your flow just like this without any issues — it doesn't require that you connect that “No” to anything.
But if you want to make sure there are no loose ends anywhere, you can set it to loop back around to the first condition:

Then? Rinse, lather, and repeat.
Add a new message with the User Input option to create buttons for anyone taking the test
Once you have your second question set up, you can connect the actions from your first question over to it:

Then run through the process again.
Set up your actions and conditions for each possible answer, assigning your answers a value as you go and telling ManyChat how much value to add to the Quiz Total for each response.
When you've added all of your questions, your Flow will look something like this (depending on how many questions you have total, and how many possible answers you've included for each):

Kind of a monster right?
Now it's time to close it up.
Step Five: Create the Results Messages
Exactly how you close your Flow is going to depend on how you've set up your quiz to run.
In this case, I have five possible results. The result they get will depend on what their final Quiz Total is:
- 10-19 = Web Content Writer
- 20-28 = Article / Feature Writer
- 29-38 = Business Writer
- 39-44 = Instructional Writer
- 45-50 = Technical Writer
So, first, set up a message asking the audience if they're ready to see their result, and set the actions from your last question to all point to it. This will tell them that the quiz is over and give ManyChat a few seconds to catch up.

You can skip this step if you want, and have the actions from your last question all point to the next Condition instead, but it can be a little jarring when results to a test just start popping up.
The results of this test are going to be set up pretty much the same way as the series of questions was set up:
- Set up a Condition for the Quiz Total.
- Does the Quiz Total meet the Condition? If Yes, send result.
- If No, run a new Condition.
To set up the first Condition, ManyChat needs to check whether or not the answer in Quiz Total falls within a range: which means adding in two criteria and making sure it is set to check for both:

When you've finished adding in all the checks and possible answers to your quiz, you end up with something that looks like this:

Just as before, I've looped the “No” from the last Condition back around to the first Condition to make sure everything is closed up.
If you prefer, you can just have ManyChat send up the total along with a brief message and allow people to read the entire results spectrum and decide for themselves. I chose to break down the answers because this is Messenger and I didn't want to send a super-long message.
This is also the time you want to Preview your test by clicking on the white Preview button at the top right of the screen. This will allow you to see the test from your audience's perspective as well as spot any holes that might have been missed.
Once you're happy with everything, you have a couple finishing touches and this test is ready to go.
Step Six: Create Your Call to Action
With the test working the way you want it to work, it's time to wrap it up and tell your audience what you want them to do next. This can be anything you want:
- Check out your webpage
- Sign up for your newsletter
- Sign up for your free course or challenge
- Join your group
With any of these options, the process is pretty straight forward. Set up a message with a button at the bottom and put the link you want them to follow in the button..
I said earlier that I wanted people to share this quiz with their friends. So I am going to make that easy for them to do by using a Share Card.
So, first, I want to add in a delay. After all, the bot just sent them their result and I want to make sure they have enough time to read it before a new message pops up and throws it upward (which is annoying and makes everything a little harder to read).
Next, I want to add in a message thanking them for taking the quiz and inviting them to share it below. To add in the card, I just select the Card option from the list:

The card has three fields to fill in: an image (909px by 476px), a headline, and a sub heading. You'll want to fill this out, keeping in mind that the person who receives the card is receiving it from a friend who just took your quiz.
As you fill in your card, a smaller popup will appear at the side. This is where you would put in the link from the Ref URL growth tool you created before:
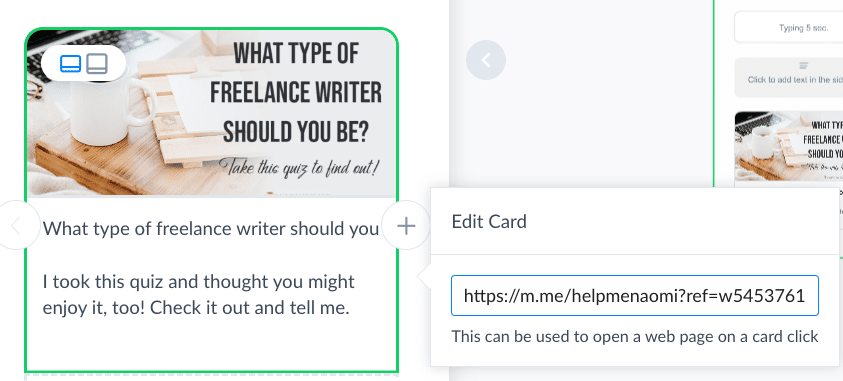
Now, when the recipient taps or clicks on the image in that card, they will be taken to your chatbot so they can take the quiz, too.
For the share button, click on the Button below the card and select “Share this Card”:

And you're all set! This is what my final message to a quiz-taker looks like:

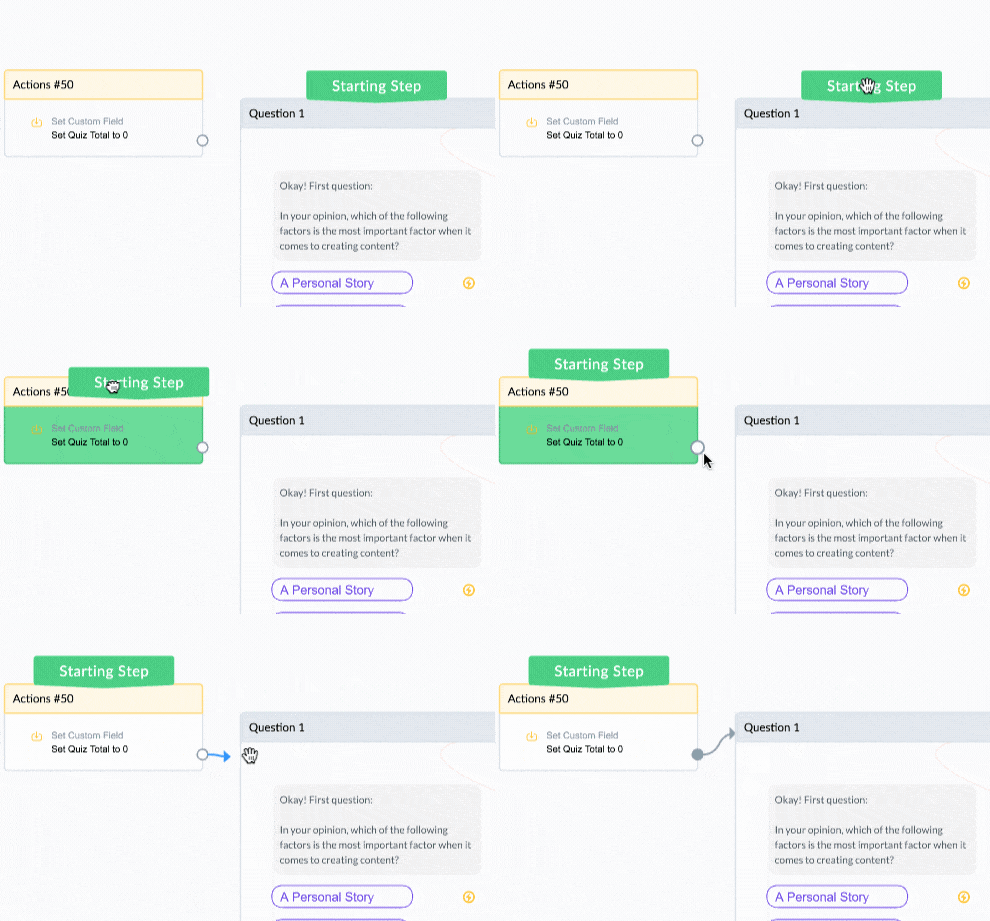
Once everything is set up just the way you want it, you'll want to make sure the test is always ready, including for anyone who might want to retake the test. So to do that, we want to add a new step to the very beginning of the test where ManyChat will reset the Quiz Total back to zero:
First, add a new action and drag it over to your first message:

Next, click on that Action and use the “Set Custom Field” option to reset the Quiz Total field to zero:

Finally, drag the green “Starting Step” flag over from the message to the top of the action, and connect the action to your first message:
And you're finally ready to share your new quiz!!
Go ahead and hit “Publish” (big blue button in the top right corner of your screen). Then go back to your Growth Tool and finish connecting the Flow so you can activate that.
(PSST, if you're short on time and would rather just install a prebuilt template, we can do that too!! You can purchase this entire template, complete with a ready-to-use growth tool opt-in, for just $45. Just install, add your own questions and answers, and you're ready to go!)!
Did you enjoy this article? Here are some more posts about social media marketing you might like:
- Book Marketing for Authors 101: I'm Ignoring All Your Sales Announcements (And Here's Why)
- Create a Facebook VIP Group that Rocks (and keep it that way)
- Using the new Clubhouse App for Writers
- Please Get Rid of that Twitter Feed on the Sidebar!
- What to do when you get Overwhelmed by the Social Media Marketing World



Hello Naomi,
Great article! I am new to bots and am working on my first quiz. I have a few kinks that I need to work out, I would be interested in purchasing your template. I believe it would be a great learning tool.
Could you send instructions on how to do purchase template?
Hi Rick! I’m so glad you enjoyed this post. I’m so sorry the buttons weren’t showing. I’ve been rebranding and making some changes to my theme and missed that the buttons disappeared. You should be able to see them in the post now.
Wow…fantastic content and instructions. I need to wrap my brain around all of it to figure out how to create a quiz so I can make appropriate product recommendations based on their answers.