Disclosure: Some of the links on this post are affiliate links, which means I may receive a small commission if you click a link and purchase something I have recommended. While clicking these links won't cost you any extra money, they will help me keep this site up and running and keep it ad-free! Please check out my disclosure policy for more details. Thank you for your support!
Book teasers can be a great way to help strengthen your marketing plans.
They offer your readers new insights into your book, drum up excitement, and increase anticipation. And they do it all without looking like salesy, icky, spammy posts that are bound to annoy all your friends.
Now we're going to talk a bit about how to create book teasers and how to use them in your marketing. I am going to walk you through step by step how to create amazing, eye-catching teasers using an online photo-editing software known as PicMonkey.

You can create book teasers for marketing in 4 steps:
- Choose the type of teaser you want to create.
- Choose the quote or text you want to include.
- Choose a background image.
- Format and adjust.
Choose the Type of Book Teaser to Create
First, we need to know what type of teaser you're going to make. Are you planning on a short teaser or a long one? Something that gives a peek into the story, or the characters? Any character in particular?
To choose, think about the message you want the teaser to give to the reader. You can choose a direct quote straight out of the book, something from the blurb, or even a generic introduction.
Personally, I like direct quotes because readers love finding them in the book later on. I'm not sure why that is? I just know that every time I come across a quote within a book that I recognize from a teaser, I get a little giddy: “there it is!”
Choosing a quote.
I am going to use a quote out of a piece of dialogue from one of my works in progress: Ripper.
“He stabbed you?” Faith whispered as she sat on the edge of the bed. “That pencil prick cocksplat! What happened after that?”
Why this quote? For one thing, I think it's a little funny.
And it introduces one of my main characters, Faith, and sets up her attitude a bit: not overly lady-like.
Finally, it creates just a bit of mystery. Ripper takes place in 19th Century London, the time of Jack the Ripper. But who is she talking to? I'm leaving the reader with this question. Is she talking to one of Jack's survivors? Or a potential victim?
Choosing a background image.
Next, we need to find a background image. The image can be of just about anything you want. You can choose a plain background, or one with a photograph.
There are quite a few places you can go to for stock photographs and images:
Just be sure to look for their usage license. Specifically, you want to find stock photos that come with either “Public Domain” or “Commercial Use” licenses.
Wherever you decide to go, start searching until you find a photo that depicts the overall look and feel of the book teaser you want to create. I usually start with a fairly specific search, and then adjust and broaden my search as idea come to me.
For my example, I found this image on Free Images:
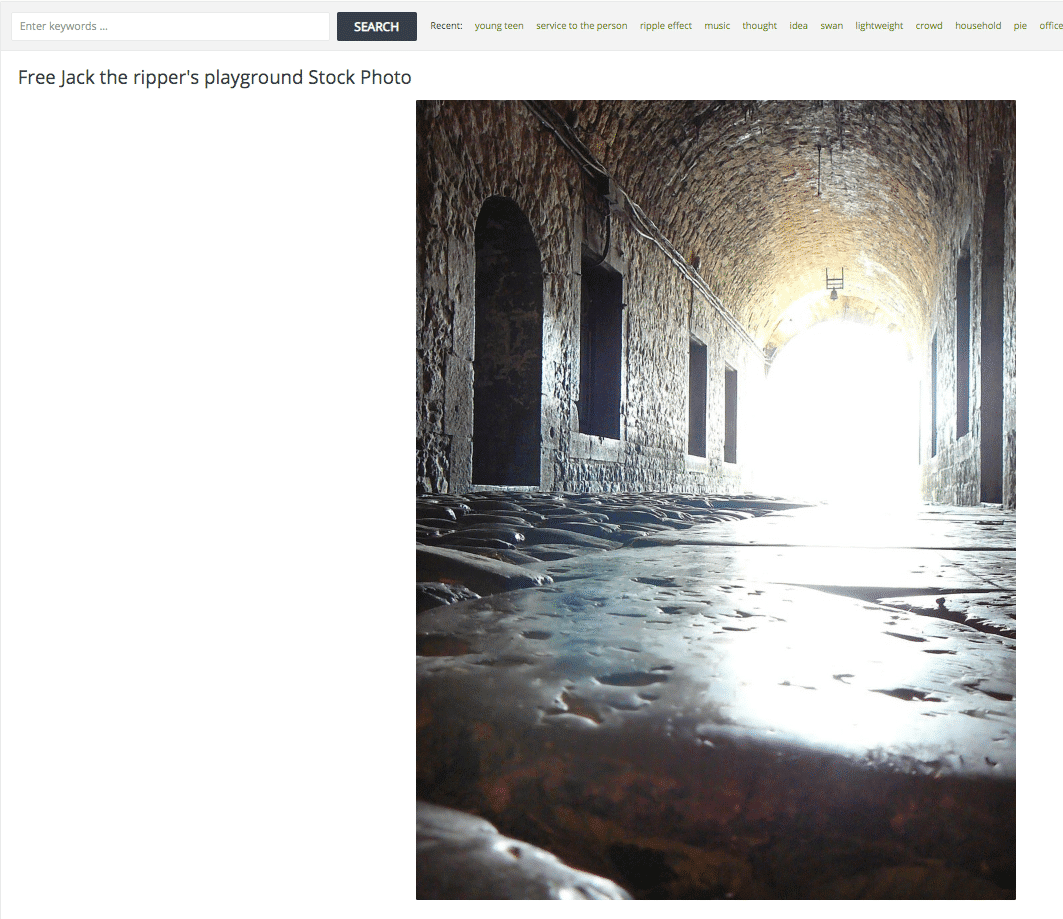
Down below the photo, you can find the link to download. For most stock photo sites, you'll need to be logged in to download, but it's free to sign up to any of the sites I mentioned earlier.

And while you're downloading your image, go ahead and check on the license. One of the reasons why I love each of these free image sites is because they all make it so easy to know exactly what I'm allowed to do with each photo.
Sometimes, licenses can get confusing (ie, does “commercial use” mean you can use the image on a client's project? Or just your own? Does it cover printed copies or only digital? Can I modify or edit the image?) If you're not sure what you're allowed to do with an image, and the license doesn't seem clear to you, message or write to the photographer and ask. They will be happy to explain it to you and you won't risk getting in trouble.

Once you have your background image and quote picked out, time to head over to your favorite graphics program.
For this tutorial, I am going to be using PicMonkey, which is an affordable web-based graphics editing program, and one of the tools I happen to use a lot.
Time to head over to PicMonkey.
Now we get to start the magic. Head on over to PicMonkey and get ready to create your book teaser.
Now, before we get too much further in this, PicMonkey does offer a free 7-Day trial, which allows you to test out everything. However, before you can download your finished book teaser graphic, it will ask you to upgrade to a paid account. The price for their smallest plan is $7.99 per month if you pay monthly, or $72 ($6 per month) if you sign up for a yearly subscription.
Yes, PicMonkey used to have a free account option. However, over the past two years, they have added so many amazing features that honestly, it's completely worth the price and then some. Additionally, it's still one of the lowest-priced graphics editors out there.
Now, let's dig in. Get signed up for your free trial on PicMonkey and log in.
You'll see several options available to you right away. But since we want to manipulate the photo to use in the teaser, we're going to create a new image from scratch:

The next screen will show you even more options. We are going to go with a blank canvas:

Make sure you put in the dimensions (width and height) you want the final image to be. The default dimensions will be filled in as 2000×2000. You can leave this if you're not sure what size you need and crop later.

PicMonkey will then ask you to fill in some basic information about the image you're creating. You can leave the default information if you want, or make some changes. When you're ready, click on “Create.”

Once you click on Create, you'll be brought to the actual editor so you can start making your edits.

Upload your background photo.
I like pulling up the photo and using it as an overlay because it makes it easier to manipulate, resize, and rotate it before making it part of the background.
To upload your photograph as an overlay, click on the Photos icon over on the left-hand side:

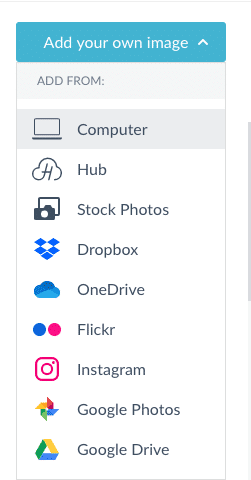
Then, click on”Add your own image” to pull up the menu and choose where your image is coming from (I'm adding from my computer since that is where I downloaded the image to, but as you can see, PicMonkey has several integrations you could use if you prefer cloud storage or if you wanted to even pull straight from another program):
Once uploaded, your photograph will appear over the background image in the editor window. You'll also see another panel appear next to it. This is the Graphics Editor window, in which you can make changes to the transparency and color, flip, rotate, or even crop the image.

You'll also notice that the photograph itself does not completely cover the background.
Use your mouse to grab the blue border and resize your photo to your liking. If you hold down the Shift Key on your keyboard while you drag the border, you can skew it either wider or taller; otherwise, the image will resize using locked dimensions so nothing gets stretched.
You can also move the photo around on the canvas. For this one, I want to really focus on how the light falls onto the cobblestone, rather than the alleyway itself. So, I'm resizing the image and moving the source of light to just off the side:

You can still see the border outline of the photo even after it's been stretched out past the edges of the canvas. At any point, I can use these to further resize and reposition the photograph.
Now the fun stuff.
PicMonkey makes it easy to add special effects to your graphics. If you're already a pro at Photoshop, you'll be glad for the ease and speed of PicMonkey. If you're clueless when it comes to Photoshop, you'll rejoice that this is so easy.
Once my background is the size and position I want it in, I want to go ahead and flatten the image so that the overlay becomes the background. To do this, click on the Layers icon over in the bottom-right of the editor:

Then select “Flatten all layers”

Then we're going to head back over to the main menu and select “Effects” so we can see what's available:

PicMonkey is going to show you several options for effects that can be applied to the background of your graphic.
Take some time to go through the different options and pick an effect you like. This is a completely optional step, so if you don't want to use any special effects, you can go ahead and skip down to the adding the text.
For this teaser, Ripper happens to be a semi-dark book: lots of murder and fighting and blood. So I am going to go ahead and apply the Dusk effect to give my background image a slightly more ominous feel.
Adjust your effects and click on Apply when you're ready.
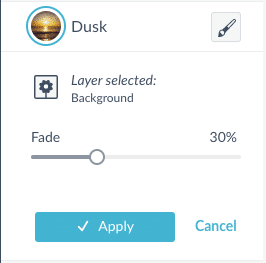
If you change your mind or don't like the effect, you can click on cancel and choose another one.
You can add more than one effect if you like. Just click on apply before switching to the second one so they effects will stack.
Time to add the quote.
Once your background image is to your liking, it's time to add in the text. Over on the left-hand side, select the Text icon.

Then click on the Add Text button to bring up the Text panel.

PicMonkey has a huge selection of fonts you can use, so unless you have a very specific branding need, you should be able to find something that fits.
If you have one of the larger plans, you can also upload your own font.

The most important thing when it comes to choosing a font is to choose something that can be read quickly. This book teaser is going to be viewed online, likely by someone who is scrolling through things. So you want to avoid the fancier fonts that take time to read.
Once you select your font, the toolbox changes to where you can adjust some settings. Things like color, font size, and alignment are all available for you to adjust.
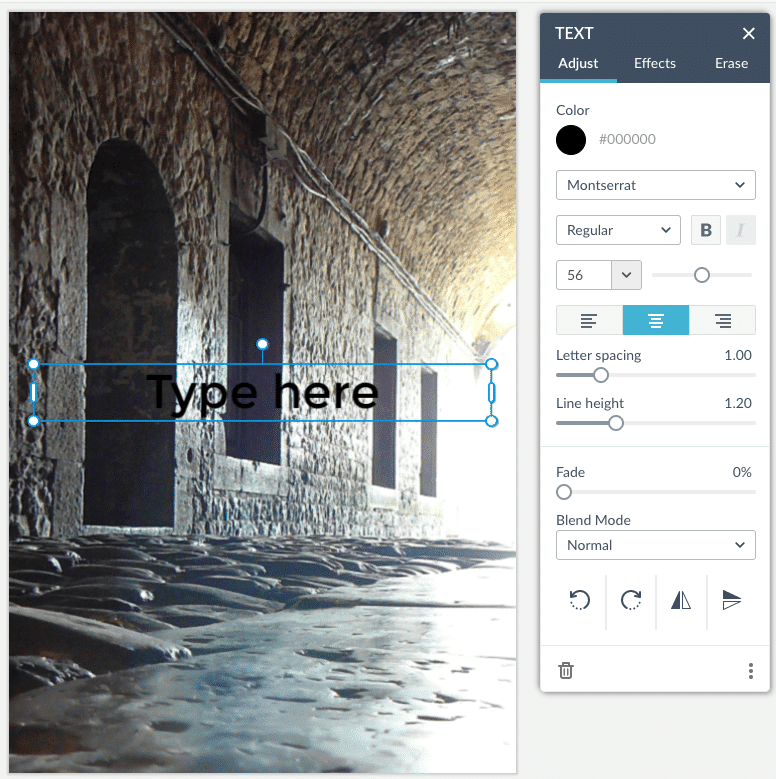
Obviously, since my background is so dark, I am going to want to change the font color to something lighter.
You can either type in your quote directly, or do what I did and simply copy-paste it into the box.
Just as before with your photograph, you can adjust the size and area of your quote, change the font colors, and even play with the available effects until you have it set up exactly the way you want it.

Just as with the photograph overlay, the box surrounding your text can be used to resize your text. You can also click on your text and move the entire box to line it up with the picture however you like.
Once your quote is ready, add the rest of your information.
Once you have adjusted your quote the way you want, all that's left is to add in the rest of the information that you need. In my case, this includes the character's name, the book title, my logo, and my website. This was all done by using the same tools and steps I described above: choosing fonts that match my book, uploading my logo as an image, adding in a new text layer.

All that's left to do now is to save your work. PicMonkey will automatically save your book teaser to your hub, so should you need to make future edits or leave and come back, you can.
You can also choose to share your image directly from PicMonkey by selecting the Share button and then choosing the platform you would like to share to:

To save the image to your computer, select the Download button and choose how you would like to save the image.
PNG images work best when there is a transparent element to your image that you want to preserve or if the image is made up of stark, contrasting colors with sharp lines – like color blocks. JPG images are compressed more than PNG images are, so they are smaller, and work best for photographs – anything with gradual color changes.

And that's it.
Easy, right?
What I like to do is sit down one afternoon and create several of these book teasers for my clients all at once. You don't have to upload or share them across social media all at once, but I like having them available so they can post them on a whim should they need to.
And, you aren't limited to just book teasers.
You can use these methods to create graphics to accompany your posts on Twitter or Facebook, branded images for Instagram, blog images to carry through to Pinterest. Anywhere you want to create a graphic appearance for your brand, PicMonkey can help you create it.
And there you have it: a step-by-step tutorial on how to use PicMonkey to create book teasers for marketing. What are some things you can create with these steps? I'd love to see what you come up with!
Did you enjoy this article? Here are some more posts on marketing graphics you may like:


